MIC400 Series Camera | Installation and Operation Manual AAAEN | 23
Bosch Security Systems Issue 1
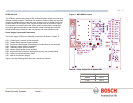
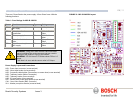
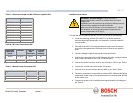
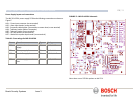
Table J - Alarm Input header for MIC-IR Power Supplies HD2
Connection Function
HD2 pin 1 Alarm 1
HD2 pin 2 0v
HD2 pin 3 Alarm 2
HD2 pin 4 0v
HD2 pin 5 Alarm 3
HD2 pin 6 0v
HD2 pin 7 Alarm 4
HD2 pin 8 0v
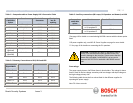
Table K –IR Lamp Connections HD6
Table L –Washer Pump Connection HD7
Installation Instructions
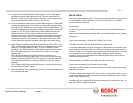
To install the MIC-IR-240PSU and MIC-IR-115PSU please do the following:-
1. Locate the mounting position of the MIC-PSU so that it cannot be
interfered with either intentionally or accidentally, a lockable cabinet is
recommended.
2. Securely fix the MIC-PSU using M4 stainless steel screws & washers;
ensure the cable glands have sufficient room to allow for the cables to
enter.
3. Feed all cabling through the appropriate sized gland holes.
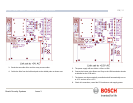
4. Connect the composite cable to HD3 following the colour coding as shown
in the Table B & printed on the PCB, connect all wires.
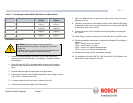
5. Connect the Brown and Grey wires for the IR lamps to HD6 as per Table J
6. Connect the Coaxial video cable to the CN1 header.
7. If alarms are to be used connect these to HD2 as per Table I above
8. Telemetry connections are provided by headers HD3, HD4 and HD5 which
respectively enable crimp or screw terminations for connecting the MIC400
to the control room.
9. Connect the power to HD1 carefully observing the polarity and voltage as
per Table A.
Composite
cable Wire
colour.
Function Terminal
Box
Connector
Terminal
box ID
marking.
Brown IR Lamp
+
HD6-1 IR+
Grey IR Lamp - HD6-2 IR-
Signal Connection Ident
Washer pump Live HD7 pin 1 L
Washer pump Neutral HD7 pin 2 N
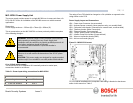
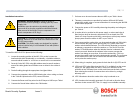
WARNING: Electrical Danger: Ensure all power is
disconnected before opening or working upon any Power
Supply Unit.
Installation must be carried out by suitably qualified persons &
all local safety regulations should be followed.
After removal of the lid take care of components C7, C9 and
IC2 heatsink. In normal operation these components can
reach a temperature of 55 Deg C.


