


The Control Panel 133
4. Press Menu to register your setting.
5. Press , then press . You see ALIGNMENT in the lower row of the LCD.
6. Press Menu, then press or to select MANUAL.
7. Press Menu, then press or to select BI-D 2-COLOR.
8. Press Menu to print the head alignment pattern.
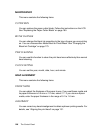
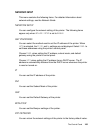
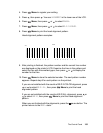
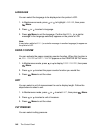
Head alignment pattern examples:
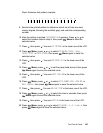
9. After printing is finished, the pattern number and the current line number
are displayed on the printer’s LCD. Examine the lines in the pattern and
select the line with the smallest gaps, then press or to display the
number for that line.
10.Press Menu to store the selected number. The next pattern number
appears. Repeat step 9 for each pattern on the printout.
If you are not satisfied with the results of BI-D 2-COLOR alignment, press
or to select BI-D ALL, then press Menu to print the head
alignment pattern.
If you are not satisfied with the results of BI-D ALL alignment, press or
to select UNI-D, then press Menu to print the head alignment
pattern.
When you are finished with the alignments, press the pause button. The
printer returns to the READY state.
VLm
123456789
Lc
123456789