


Taking Pictures
2-15
R4C3700
Rev.D
A5 size CHAP2.FM
4/21/99 Pass 0
R
Proof Sign-off:
Ohtera _______
Fujimori _______
Pipa _______
2
User setting for the white balance
Follow the steps below to create your own white
balance setting.
1. Follow steps 1 to 5 in “Adjusting the white
balance” on page 2-14.
2. Select
(Setting)
using the button, then press
the
SEL
button. WB (Setting) appears on the LCD
monitor.
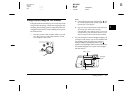
3. Place a white sheet in front of the camera lens so
that it is previewed on the whole LCD monitor,
then press the shutter button. Your setting is
saved and the monitor returns to the white
balance setting menu.
Note:
You can also use a colored sheets. For example, to create
a sepia hue, use a blue sheet. To create a blue hue, use
a yellow sheet. Experiment with many colors for
different effects.
4. Select
User
using the button and press the
SEL
button.
5. Make sure
User
appears next to the white balance
icon , then press the
ESC
button twice.
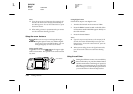
Adjusting the exposure
Exposure refers to the amount of light the
camera captures when a photo is taken.
The camera’s default exposure setting is
Auto
, to
adjust the exposure of your photos automatically.
However, you can manually adjust the exposure to
change the darkness or brightness of your photos for
certain conditions.
Adjust the exposure to + when:
❏
You want to make your photos lighter.
❏
The photo you have taken is too dark, and you
want to increase the brightness.
❏
You are taking pictures of a white object which
may tend to look grayish in the photos.
❏
You are taking pictures of an object with a bright
background, such as windows facing the sun.
❏
You are taking photos at the beach or in the snow
on sunny days, or taking photos of an object with
a white background.