


Using Direct Print to Print Photos
4-3
R4C3700
Rev.D
A5 size CHAP4.FM
4/21/99 Pass 0
R
Proof Sign-off:
Ohtera _______
Fujimori _______
Pipa _______
4
Installing the Direct Print Program
Your camera comes with Direct Print Ver. 2.3 installed.
However, depending on the model of the EPSON
printer you use, you may need to install Direct Print
Program Ver. 2.2 in your camera. To check which
version your printer supports, see “Requirements” on
page 4-2. The included software CD-ROM contains
both versions of the software.
Note:
❏
EPSON STYLUS PHOTO, PHOTO EX, and
PHOTO 700 printers support both versions of Direct
Print.
❏
To make more space in your camera’s memory, delete
any unnecessary version of the software from your
camera.
You can install Direct Print in your camera from your
computer using the EPSON Program Uploader utility.
This utility is installed automatically when you install
the EPSON Photo!2. To install EPSON Photo!2, see the
EPSON Photo!2/File Uploader User’s Guide
.
Once EPSON Program Uploader is installed in your
computer, follow these steps to install either version
of Direct Print to your camera.
Note:
You can also install the Direct Print Program using an
optional CompactFlash Card. For instructions on using
CompactFlash Cards, see Chapter 5, “Camera Options”.
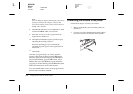
1. Make sure both the camera and the computer are
turned off.
2. Plug the cable connector into the serial port (for
Windows) or the modem port or printer port (for
Macintosh) on your computer.
3. Open the connector cover on the side of the
camera.
4. Plug the other end of the cable into the camera’s
serial port.
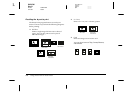
5. Turn on your computer and insert the software
CD-ROM in the disk drive.
6. Turn the dial switch on your camera to
Play
.
7. Click or double-click the
EPSON Program
Uploader
icon in the EPSON Photo!2 program
group or folder. The EPSON Program Uploader
window appears.