


Viewing and Managing Your Photos
3-7
R4C3700
Rev.D
A5 size CHAP3.FM
4/21/99 Pass 0
R
Proof Sign-off:
Ohtera _______
Fujimori _______
Pipa _______
3
Using the LCD menus
The LCD menus allow you to erase one, several, or all
photos from the camera’s memory at a time.
Erasing one or more photos
Note:
Be sure to unlock the photos before erasing them. See
“Unlocking photos” on page 3-9.
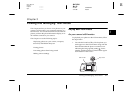
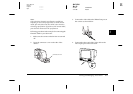
1. Turn the camera’s dial switch to
Play
.
2. Press the
SEL
button. Four menu icons appear on
the top of the LCD monitor.
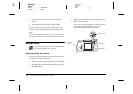
3. Press the or button until Photo Control
appears on the monitor, then press the
SEL
button.
The Photo Control menu appears on the screen.
4. Make sure
Erase
is selected and press
SEL
. The
Erase Photos menu appears.
5. Using the or button, choose
Select Photo
to erase the selected photo or photos, then press
the
SEL
button.
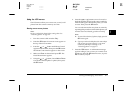
6. Press the or button to move forward or
back through the images in the camera until the
white frame appears around the photo you want
to erase. Then press the
SEL
button.
You can select more than one photo at a time by
repeating this procedure. When all the photos you
want to erase are selected, go to the next step.
Note:
❏
To cancel the selection of a photo, simply press the
SEL
button again.
❏
If you try to select a locked photo, the camera beeps
and prevents you from selecting it. You must
unlock the photo before selecting it. See
“Unlocking photos” on page 3-9.
7. Press the
ESC
button. A confirmation message
appears asking if you are sure you want to erase
that image. Press the
SEL
button to erase, or press
ESC
to cancel your job.