56
[Add custom size] button
You can create up to 5 custom sizes.
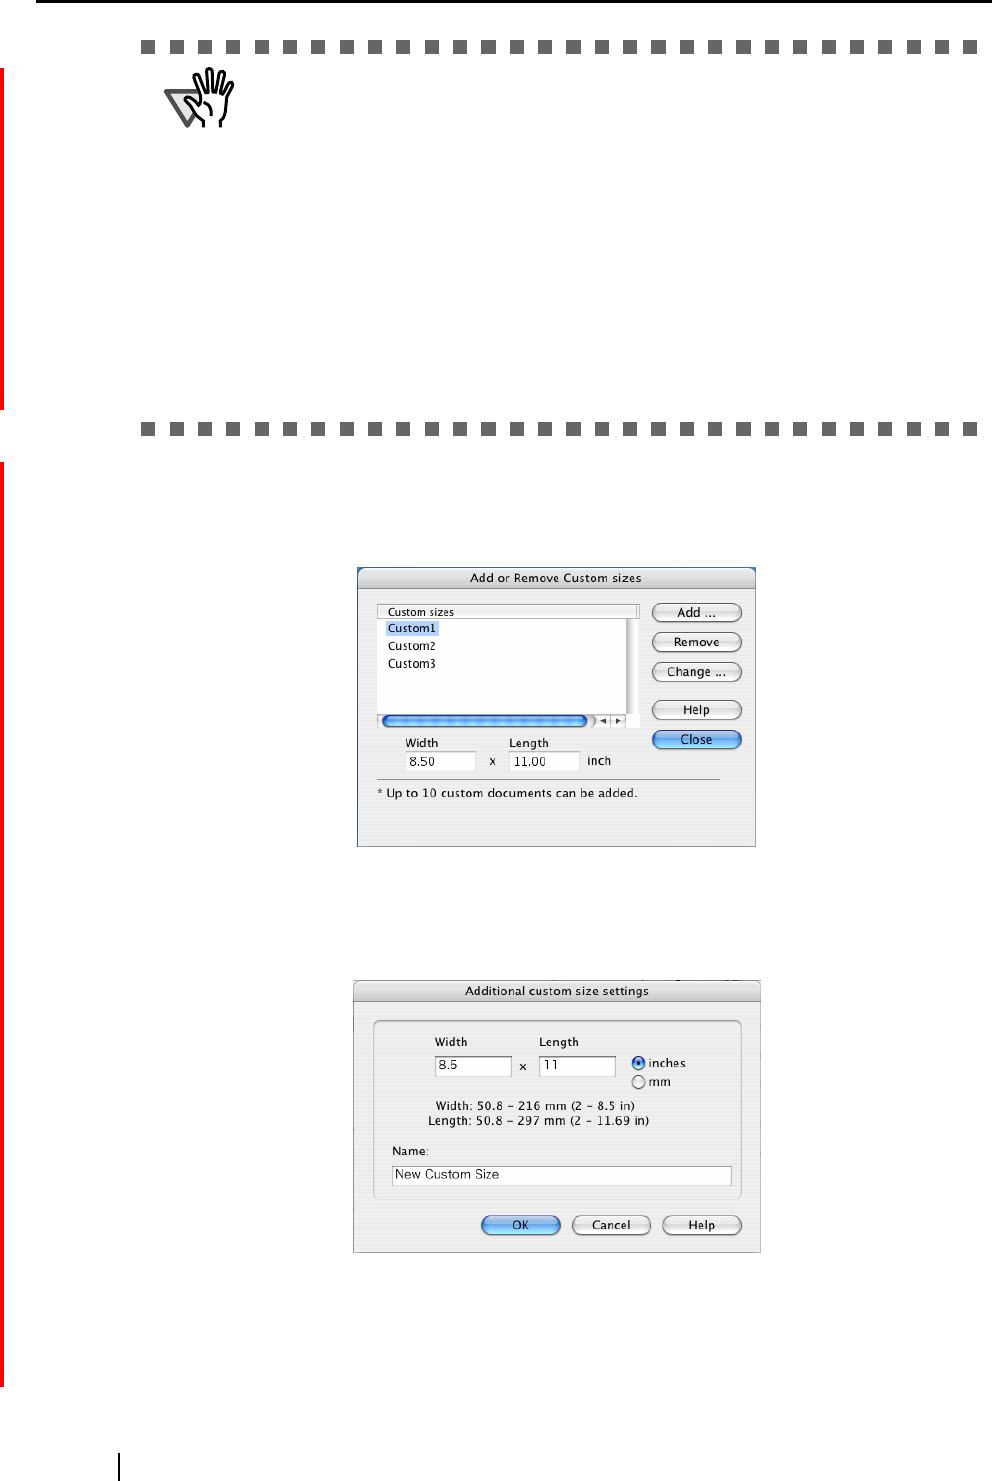
Clicking the [Add custom size] button displays the following window.
To add custom size documents
1)Click the [Add] button.
2)The following window appears.
•Type in the width and length.
You can create custom sizes of the following:
Width: 50.8 - 216 mm (2 - 8.5 in.)
Length: 50.8 - 297 mm (2 - 11.69 in.)
ATTENTION
• When you select [Automatic detection] in the "Output image size" drop-down list and
scan an irregular-sized document (not in the table above), the scanned image is output
in a standard (ISO) size longer than and nearest to the original document size.
The next longer ISO size may not be wide enough for your document. If the document
is clipped, or if you want to output a scanned document image in its original size, create
a custom document size beforehand in the "Add or Remove Custom sizes" window,
and then select the custom size in the "Output image size" drop-down list. The "Add or
Remove Custom sizes" window appears when the [Custom] button is clicked.
• When you select [Automatic detection] in the "Output image size" drop-down list, the
output image size may be larger than the original. If so, try the following:
- Insert a document into the Carrier Sheet so that the sides of the document and
Carrier Sheet becomes parallel.
- Adjust the side guides to the width of the Carrier Sheet to prevent the Carrier Sheet
from skewing.
If the situation does not improve, select a size in the "Output image size" drop-down list.
