


71
Ⅵ The following phenomena are not malfunctions.
● The screen momentarily turns red or black when the sun
enters the field of view.
● Black dots, or shiny red, blue, or green spots appear on
the screen.
(The LCD screen contains 99.99 % or more effective pixels,
but 0.01 % or fewer pixels may be inactive or always lit.)
Ⅵ Reset the camcorder when it does not function properly.
1 . Turn the power [OFF].
2 . Remove the battery and AC adapter from the
camcorder, reattach them, and turn on the power.
3 . Apply [RESET ALL MENU] in the [CAMERA
SETTINGS] menu.
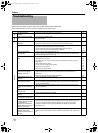
Symptom Action Page
Screen
Screen appears dark or whitish. ● Adjust the angle and brightness of the screen.
● When used in cold places, the screen may appear darker.
● The screen may be reaching the end of its service life. Consult our authorized dealers
or JVC service center.
22
-
-
Screen display is difficult to see. ● The screen may be difficult to see if used in bright areas, such as under direct
sunlight.
-
Screen is blank. ● Operate the camcorder. (If the camcorder is not operated for a certain length of time
when the AC adapter is in use, the screen will turn off automatically to save energy.)
● Press the DISPLAY button.
● If the camcorder is in the still picture playback mode, set the [ON-SCREEN DISPLAY]
menu to [DISPLAY ALL] or [DISPLAY DATE ONLY].
-
15
69
The remaining battery power is
not correctly displayed.
● Charge the battery fully, use it up, and then charge again.
● If the camcorder is used for long periods of time in high or low temperatures, or if the
battery is repeatedly charged, the remaining battery level may not be displayed
correctly.
19
-
Screen display is uneven. ● If the screen or surrounding parts have been pressed, remove your hands and leave
the camera for a short while. (Applying pressure causes image unevenness.)
-
No display on the TV monitor. ● Set [DISPLAY ON TV] in the [CONNECTION SETTINGS] menu to [ON]. 63
No display on the LCD screen or
viewfinder.
● Check the [PRIORITY
SETTING] in the [CAMERA SETTINGS] menu.
● When the HDMI, COMPONENT OUT or A/V OUT terminal is connected, video
images will not appear on the viewfinder. Remove the cable.
66
49
Time code or user’s bit is not
displayed.
● Set [TC DISPLAY] in the [TC/UB] menu to [TC] or [UB]. 64
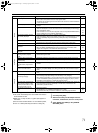
Playback
Unable to switch from the
shooting mode to playback
mode.
● Check whether the pause mode of continuous clip recording is set. If it is, end the file
before switching the mode.
28
Sound or video is interrupted. ● Sometimes playback is interrupted at the connecting section between two scenes. -
A part of the TV monitor screen
appears shaky.
● Set [HDMI OUTPUT] in the [CONNECTION SETTINGS] menu to [AUTO]. 63
Images look unnatural on the TV
monitor screen. (long and thin,
etc.)
● Adjust [VIDEO OUTPUT] in the [CONNECTION SETTINGS] menu to match your TV
monitor.
63
Recorded videos cannot be
found on the index screen.
● Check the video file format or video format. (Adjust the [FILE FORMAT], [SYSTEM
SELECT], and [REC MODE] menu settings to match the video format to be played
back.)
61
62
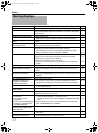
Others
The camcorder heats up. ● This is not a malfunction. (The camcorder may become warm when used for a long
time.)
-
The indicating lamp does not
blink during charging.
● Check the remaining battery power.
(The indicating lamp stops blinking when the battery is fully charged.)
● When charging the battery in a hot or cold environment, ensure that the temperature
is within the allowable operating temperature range. (Charging may stop to protect
the battery if the temperature is outside the allowable range.)
20
-
The camcorder operates slowly
when switching between video
and still picture modes or when
turning the power on or off.
● Copy the files on the SD card to a PC, and delete them from the SD card. (If there are
many still pictures (more than 1000 files) on the SD card, it takes time for the
camcorder to process the files.)
-
The remote control does not
work.
● Replace the battery.
● Set [REMOTE] in the [CAMERA SETTINGS] menu to [ON].
● The remote control may not function outdoors or under strong light conditions.
18
66
-
M9H7_EN_001D.book Page 71 Thursday, August 26, 2010 11:51 AM