


92
Recording menu
Flash Control
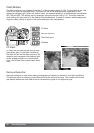
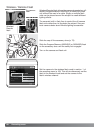
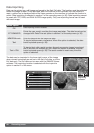
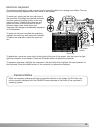
Select the manual option from flash control in section 1 of
the recording menu. With the built-in flash raised, press the
exposure compensation button (1). Use the rear control
dial (2) to select the manual flash power ratio; the front
control dial compensates the ambient exposure.
Press the shutter-release button partway down or press
the exposure-compensation button to complete the opera-
tion. The power ratio and the manual flash indicator are
displayed on the monitors when the flash is raised.
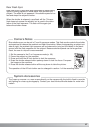
Power ratio
ADI, pre-flash TTL, and manual flash controls are available. Flash control is changed in section 1 of
the recording menu (p. 80).
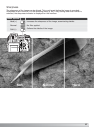
ADI (Advanced Distance Integration) flash metering - combines distance information from the auto-
focusing system with information from a pre-flash exposure. Unlike conventional TTL flash metering,
ADI is not influenced by the reflectance of the subject or background ensuring optimum flash expo-
sures.
Pre-flash TTL - calculates flash exposure with a pre-flash only. This mode must be used when using
close-up filters or filters that reduce the amount of light entering the camera such as neutral density
filters. Pre-flash TTL must be used when a diffuser is attached to the built-in flash or an external
flash unit.
The camera will automatically switch from ADI metering to pre-flash TTL when a low-contrast sub-
ject is preventing the autofocus system from focusing. If the autofocus system cannot lock on the
subject, use manual focus; the ADI metering will remain in effect.
Manual flash control - fires the flash at full power, 1/2, 1/4, 1/8, or 1/16 power. Because no pre-flash
is used, it can be used to fire slave flash units. Manual flash cannot be used with red-eye reduction
or wireless.
1
2