


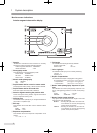

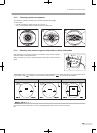

Eye level mark
15
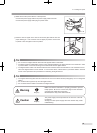
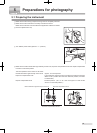
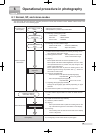
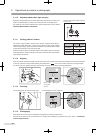
5.2 Preparations for patient’s eye examination
1
Reduce room’s illumination as bright as to make letters on this manual barely readable so that patient’s pupil can
naturally turn to the size of pupil diameter aid or greater.
2
Instruct the patient to take off his or her glasses or contact lenses.
3
Remove the top sheet of chin rest paper
.
4
Move and
keep optical component
as close as possible to you and ask the
patient to rest the chin on chin rest.
5
Adjust chin rest height until
the patient’s eye level comes to the position of
eye level mark.
6
Instruct the patient to rest his or her forehead on forehead rest.
7
Adjust height of the table which this instrument is installed on so that the
patient can place his or her chin on chin rest with ease.
8
Adjust optical component height until
it comes to the position of eye level
mark.
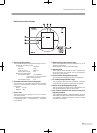
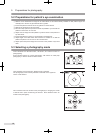
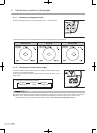
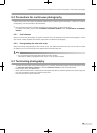
5.3 Selecting a photography mode
This instrument has “Normal mode”, “SP mode”, and “Stereo mode” for
photographing.
Press “Normal” button for normal photography, “SP” button for small pupil
photography, or “Stereo” button for stereo mode.
Upon activation of the instrument, “Normal mode” is selected.
The photography mode currently selected is indicated on the upper left
corner of LCD monitor.
This instrument also has mosaic mode photography for imaging the center
of macula and 8 points surrounding the macula. Press “Mosaic” button for
mosaic mode photography.
5 Preparations for photography