


36
This instrument is a precision instrument and daily maintenance and inspection would affect the imaging results. Please
read the following information carefully in order to use this product correctly and safely.
10.1 Daily maintenance
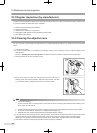
1. What to do after use:
Turn the power switch OFF
Place the lens cap on the objective lens
Place the dust cover over the instrument
2. Check that no dust, debris, nger print, or body uid is found on the objective lens.
3. Determine that the objective lens is clean before you start using the instrument the rst time each day.
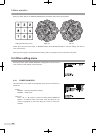
Dirty objective lens is readily
identied under the objective lens cleaning lamp (see
“9.2 objective lens cleaning
lamp”
).
When the objective lens is dirty, follow the steps described in
“10.4 Cleaning the objective lens”
to clean it.
4. Condensation
may occur on the
objective lens when the instrument is moved into an environment where there is
temperature difference. When condensation occurs, wait until it disappears before use.
5. When condensation occurs repeatedly, lenses may get moldy.
When such a case has occurred to you, contact Kowa or your Kowa dealer.
6. Disconnect the power supply cable when the instrument is not used for an extended period of time.
10.2 Daily inspection (by users)
Inspect this instrument in accordance with “KOWA nonmyd WX daily inspection table”.
When an anomaly found during the inspection may not be solved using any of the maintenance methods described in
this instruction manual, contact Kowa or your Kowa dealer.
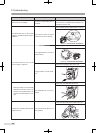
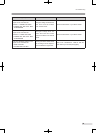
KOWA nonmyd WX daily inspection table
Inspection Procedure Acceptability criteria
Power cable
Visually verify that the cable has no aw
or damage.
No aw or damage should be found.
Objective lens See
“10.4 Cleaning the objective lens”.
No dust, debris, fingerprint, teardrop
must be found.
Exterior
Visually verify that the exterior has no
aw, crack, deformation or rust.
Exterior components must have no
aw, crack, deformation or rust.
Plates and labels
V
isua
lly verify that the ID plate and la-
bels is readily readable and not contami-
nated.
Rating plates and labels must be read-
able.
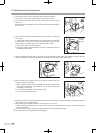
Shutter button and ash lamp
Make the instrument ready for photogra-
phy. Hold your hand in front of the objec-
tive lens. Push the shutter button and
visually verify that the ash light emitted
through the objective lens illuminates the
hand (do not look into the objective lens).
Pressing the shutter button must acti-
vate the ash lamp to emit the light.
10 Maintenance and inspection