Operating Instructions
31
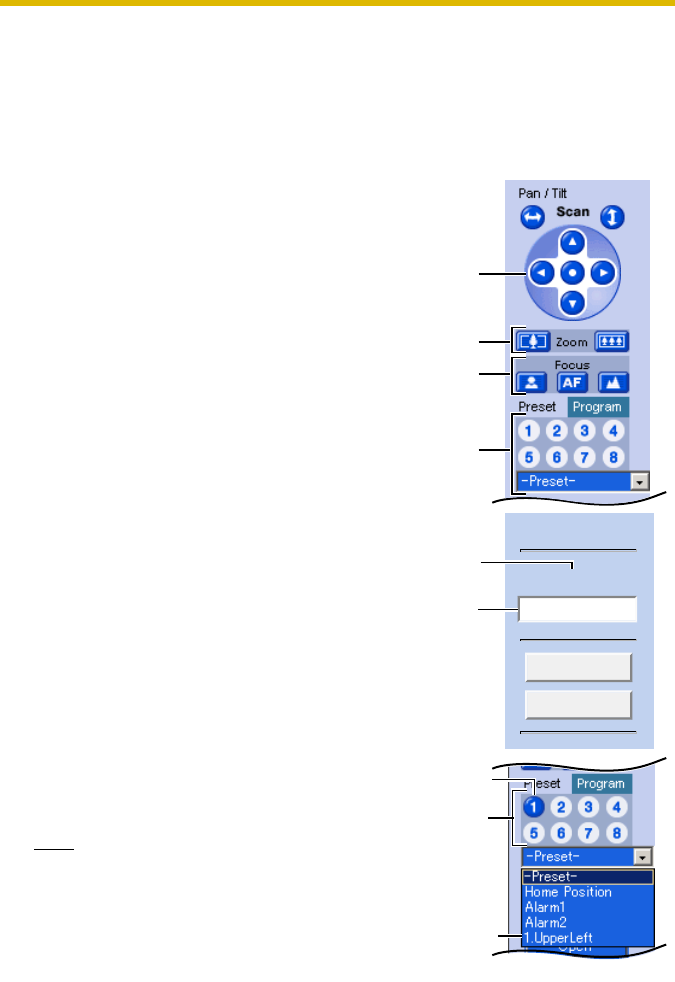
Registering a Preset Position
20 camera positions can be stored as presets. These positions can be changed
(see page 33).
• Registered buttons are shown in blue.
• Unregistered buttons are shown in white.
1. Click [Program].
• [Program] switches to [Cancel].
Click [Cancel] to quit without
saving changes.
2. Pan and tilt the camera to a desired
position.
3. Zoom to the desired position.
4. Adjust the focusing if necessary.
5. Select a preset button (1—8) or a
preset position (1—20) from drop-
down list, and enter the preset
name.
E.g.:
Setting "UpperLeft" for the preset 1.
When selecting a preset button (1—
8), enter the preset name.
• Maximum 15 characters.
• Enter ASCII characters (see
page 190) or characters in each
language. Note that [Space], ["],
['], [&], [<] and [>] are not
available.
6. Click [Save] to register, or click
[Back] and [Cancel] to cancel.
• If "Success!" is displayed, the
position has been registered
successfully. Click [Back].
Note
• When registering preset positions,
the camera also saves brightness
and white balance settings.
• Only an administrator can register
preset positions.
The button
turns blue.
The preset
number and
preset name
are displayed.
Preset Name
Preset (1) Name
Save
Back
UpperLeft
Setting
a name
Preset
number
Only buttons
1 to 8 are
displayed.
Pan/Tilt
Zoom
Focus
Preset
Position


