C611M-C (3/06) 43
SCHEDULING A RECORDING
NOTE: Service-level access privileges are required to schedule a recording.
When programming a new recording or when editing a recording, you can schedule a recording on a weekly basis.
To schedule a recording, perform the following:
1. Do either of the following:
• If you are programming a new recording, click the Time button in the Add Recording dialog box.
• If you are editing a recording, click the Time button in the Edit Recording Setup dialog box.
A dialog box appears, allowing you to schedule a recording:
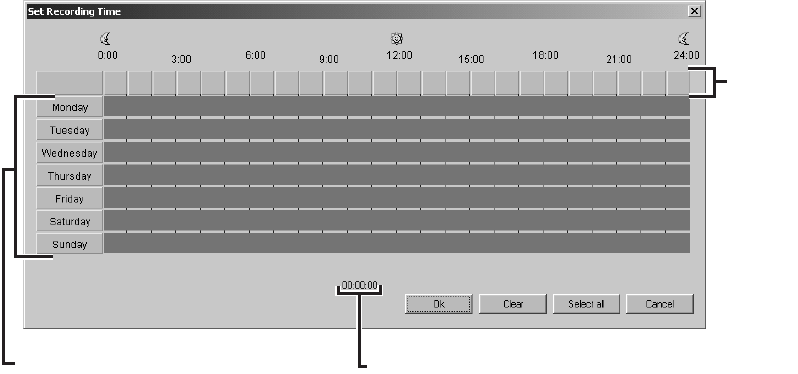
• If you are programming a new recording, the dialog box is labeled in the title bar as the Set Recording Time dialog box (refer to
Figure 30).
• If you are editing a recording, the dialog box is labeled in the title bar as the Edit Recording Time dialog box.
Figure 30. Set Recording Time Dialog Box
The Set Recording Time dialog box or Edit Recording Time dialog box, as applicable, provides a grid numbered in hours to 24 (military time)
for each day of the week—Monday to Sunday. By default, continuous recording is set for the entire week—all time slots within the grid
are selected and are shaded blue (refer to Figure 30).
2. Perform any of the following actions as required:
• To deselect all selected time slots in the grid, click the Clear button. The time slots appear white.
• To select the time slots for which you want recording to occur, you can do any of the following:
– Select all 24 hours for a particular day of the week at once. To do so, click the appropriate day selection button. The entire row
in the grid is selected and is shaded blue for that particular day.
For example, if you want recording to occur for all 24 hours on Saturday, click the button labeled Saturday. The entire row
associated with Saturday is selected and is shaded blue.
To select all 24 hours for additional days of the week, click the appropriate button for each desired day.
– Select one or more particular time slots within a day. To select a particular time slot within a day, do the following:
a. Determine the time slot in the grid for which you want a recording to begin and end. Note that the time indicator at the
bottom of the grid displays the time as determined by the position of your cursor in the grid. The time appears blue in
hours:minutes:seconds military time format (for example, 22:26:00). (Seconds are always displayed as 00.)
b. Using the time indicator as a guide, click the left mouse button on the desired starting time, drag the mouse to the desired
ending time, and then release the mouse button. Repeat this step for each additional time slot within a day you want
recording to occur.
NOTE: Always set recording to start 10 minutes before and 10 minutes after the desired scheduled time period to ensure nothing is missed.
HOUR
SELECTION
BUTTONS
TIME INDICATOR
DAY SELECTION BUTTONS
