


Tip: If the Transfer button displays a diskette, the Expert
Preferences are set to transfer directly to disk and do not need
to be changed before starting.
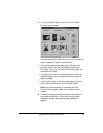
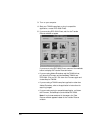
1 View the pictures in the camera as described on page 87.
2 Select one or more pictures to be transferred. (See Selecting
thumbnails on page 89.)
3 Click the Transfer button.
4 Select a directory to receive the pictures.
5 If you want, change the first six characters of the file names
given to the stored pictures. (If you do not change the
characters, the file names will contain the first six characters
of the label on the first picture being transferred. A two-digit
numeral will be appended to the six characters, producing a
unique, eight-character name for each file.)
6 Click OK to transfer the pictures.
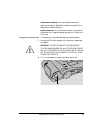
Deleting pictures from
the camera
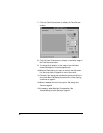
Use the following procedure to delete one or more pictures
from the camera.
If you want to keep any of the pictures you are about to
delete, be sure transfer them to the computer as described in
the previous section before you delete them from the camera.
1 View the pictures in the camera as described on page 87.
2 Select one or more pictures to be deleted. (See Selecting
thumbnails on page 89.)
3 Click the Delete button to display a confirmation message.
4 To delete the pictures from the camera, click OK.
Note: If you are not deleting all the pictures from the camera,
those remaining will be renumbered. For example, you may
decide to delete all pictures except 4 and 23. In this case,
picture 4 becomes picture 1, and picture 23 becomes picture 2.
Using the PDC-2000 with your PC 93