28
[EXPANDED FOCUS] is assigned to the
ASSIGN 7 button (p. 45).
Press the ASSIGN 7 button.
[EXPANDED FOCUS] appears and the
center of the screen is magnified by about
2.0 times. It will be easier to confirm the
focus setting during manual focusing. The
screen returns to the original size when you
press the button again.
b Notes
• Even though the image appears expanded on the
screen, the recorded image is not expanded.
z Tips
• You can select a type of an expanded image
displayed during the expanded focus
([EXPANDED FOCUS TYPE], p. 82).
Slide the FOCUS switch B to INFINITY
and hold it there.
appears on the screen.
To return to manual focus mode, release the
FOCUS switch B. This function enables
you to set focus on a distant subject even
when the focus is automatically set on a
close subject.
b Notes
• This function is only available during the
manual focus. It is not available during the
automatic focus.
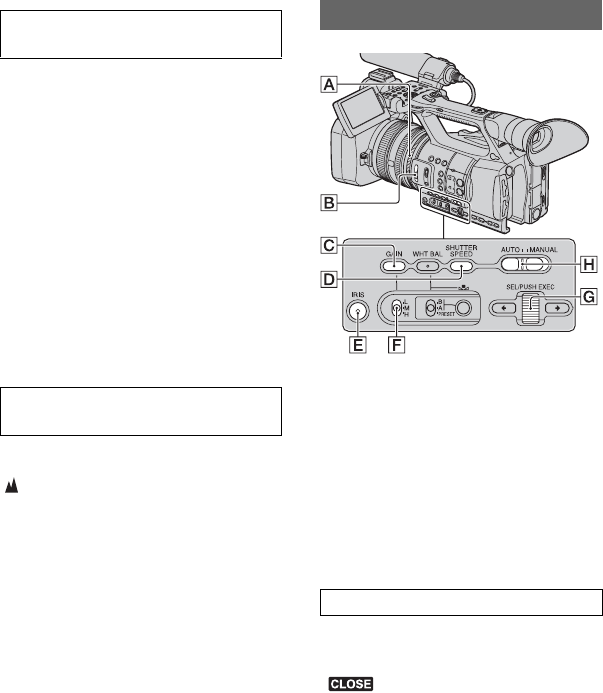
You can adjust the image brightness by
adjusting the iris, gain or shutter speed, or
by reducing the light volume with the ND
filter B.
b Notes
• You cannot use the back light function and the
spotlight function when iris, gain and shutter
speed are adjusted manually.
• [AE SHIFT] is not effective temporarily while
you adjust the iris, gain and shutter speed all
manually.
You can manually adjust the iris to control
the volume of the light entering the lens. By
adjusting the iris, you can change or close
( ) the aperture of the lens, which is
expressed as an F value between F1.6 and
F11. The volume of the light increases the
more that you open the aperture (decreasing
F value). The volume of the light decreases
the more that you close the aperture
(increasing F value). The current F value
appears on the screen.
1 During recording or standby, set the
AUTO/MANUAL switch H to
MANUAL.
Using the expanded focus (Expanded
focus)
Focusing on a distant subject (Focus
infinity)
Adjusting the image brightness
Adjusting the iris
Changing the settings of your camcorder recordings (Continued)


