


13
Hookups and Settings
Step 3: Easy Setup
Be careful not to disconnect the cables or
exit the “Easy Setup” function during this
procedure.
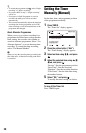
1 Insert two R6 (size AA) batteries by
matching the 3 and # ends on the
batteries to the markings inside the
battery compartment.
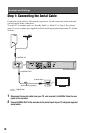
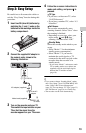
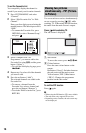
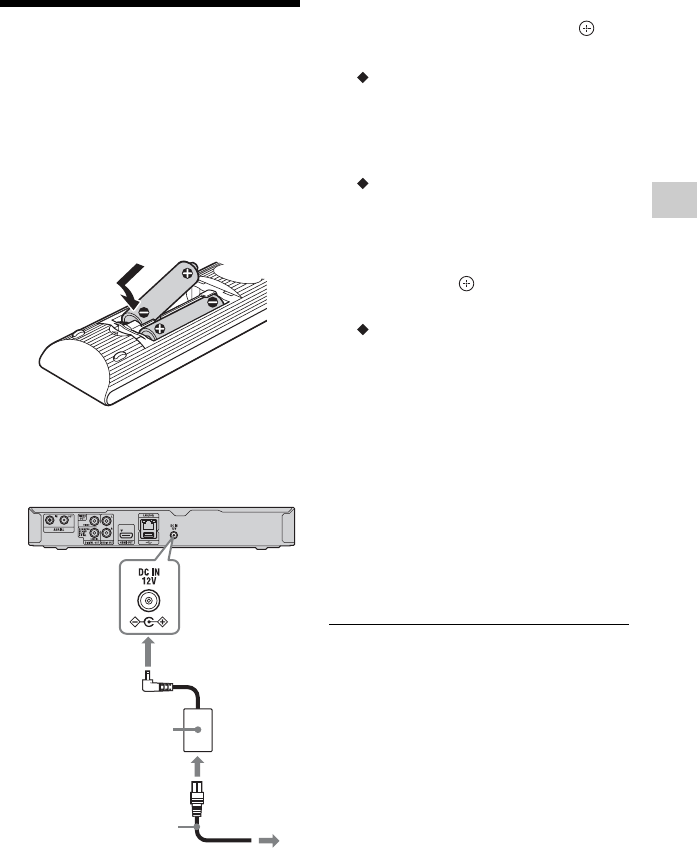
2 Connect the supplied AC adaptor in
the numeric order shown in the
following illustration.
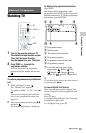
3 Turn on the recorder and your TV.
Then switch the input selector on your
TV so that the signal from the
recorder appears on your TV screen.
4 Follow the on-screen instructions to
make each setting, and press to
proceed.
TV Type
• If you have a widescreen TV, select
“16:9 Widescreen.”
• If you have a standard TV, select “4:3
LetterBox.”
Full Rescan
The recorder automatically starts
scanning channels. Select “Save” when
the scanning is finished.
• Depending on your area, select your
region using and M/m after
scanning. And then select “OK.”
Standby Mode
Select the standby mode suited to your
set up.
• Select “Mode 1” for the minimum
standby power consumption.*
• Select “Mode 2” if you need to
maintain the aerial signal to a TV
connected to the aerial out jack on the
recorder when the recorder is in
standby mode.
* If you select “Mode 1” and want to watch
TV in standby mode, use a splitter (not
supplied) to divide aerial input signals
between the TV and the recorder
(page 10).
z
• If you want to change “Standby Mode” setting
after “Easy Setup,” press SYSTEM MENU and
select “Setup” then “Power Management”
(page 35). You can change “TV Type” (page 33)
and “Full Rescan” (page 36) in a similar way.
• The recorder sets the clock automatically.
to mains
to DC IN
1
2
Mains lead (supplied)
AC adaptor (supplied)
3
to the AC
adaptor