


The Administrator Application
18
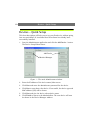
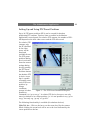
Hot Spot Window - This special window can be used for various purposes
and will, when enabled, occupy up to 9 (3x3) of the available windows,
depending on the layout in use. The Hot Spot window can show an
enlarged view from one camera, it can be used for interactive PTZ control,
or it can be used to browse through previously recorded images (Quick
Browse). To use the function, select Hot Spot and the desired window
layout.
Select Camera - To assign a camera to a particular monitor window, select
that window by clicking it and then select the camera to display there.
Note that each camera can only be displayed in one monitor window.
Settings… - This button takes you directly to the Camera Settings dialog for
the selected camera. These settings can also be accessed from the main
Administrator window. See below for more information.
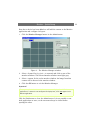
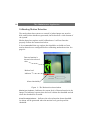
Setting Image Quality and Recording Conditions
Image quality, recording speeds, and other recording conditions can all be
set for each connected camera.
From the tree view of the connected cameras in the main Administrator
window, select the camera to configure and click the Settings… button.
The Camera Settings dialog appears. This can also be opened by selecting
the Settings… button from the Monitor Manager, as described above. The
following settings are then available:
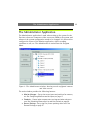
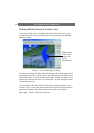
Record Settings
Desired Recording Speed - The desired recording speed is the number of
frames to retrieve from the camera each second, minute or hour. This
allows for a frame rate ranging from 24 images per day up to 30 images
per second (25 images per second for PAL). The expected time between
each image is also calculated and displayed.
Images saved in the database - Select which images will be saved. When
selecting Images with motion, only images where the level of detected
motion exceeds the given limit will be saved.