


Installation Guide
8
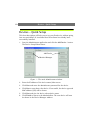
Installation
Step 1 - Locate your License Code
To install the full retail version of AXIS Camera Recorder a valid license
code must be entered. This code can be found on the product label in the
software retail box. The license code starts with “ACR” and is followed by
a combination of letters and numbers. A license code is not required to
install the Demo version of the program.
Step 2 - Connect Devices
Connect your Axis cameras/video servers to your Local Area Network.
Consult the product documentation for more information.
To verify that the camera/video server is properly installed on your
network, connect to it from a standard browser. If you cannot connect
using a browser, you will not be able connect from AXIS Camera
Recorder.
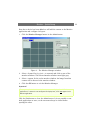
Step 3 - Install the Software
Insert the AXIS Camera Recorder CD into your computer’s CD drive. The
installation program starts automatically if Auto-Run has been enabled.
Otherwise, run the program acr.exe from the CD’s root directory.
If a previous version (or the demo version) exists on the system, the
installation program will recommend that the earlier version is removed.
After doing so, the installation program must be started once more for the
actual installation.
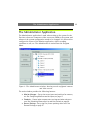
You will next be asked to accept the product license agreement. This
agreement is also supplied in printed form with the product. If you do not
accept the license agreement, select No and the installation will terminate.
Otherwise, select Yes and the installation will proceed.
Enter your name, company name and the product’s license code. Enter the
whole license code, including the hyphens. Do not include any blanks.
Complete the installation process by following the on-screen instructions.
Important!
The license code for AXIS Camera Recorder will be needed again if you ever need to
re-install the software. The code should therefore be treated as a valuable item and
stored in a safe place.