


External Connections 119
• You can play back the converted scenes from the [For DVD (SD-VIDEO)]
index screen on the memory card. Open the original movies index
screen on the memory card, press and then select [For DVD
(SD-VIDEO)].
Connecting to the Computer and Creating DVD Discs
1 Power the camcorder using the compact power adapter.
2 Open the [For DVD (SD-VIDEO)] index screen on the memory card.
• Open the original movies index screen on the memory card, press
then select [For DVD (SD-VIDEO)].
•If the device selection screen appears, select [Computer/Printer] and
press .
3 Connect the camcorder to the computer using the supplied USB
cable.
• Connection . Refer to
Connection Diagrams
( 109).
• On the computer, ImageMixer 3 SE will launch automatically and the
startup screen (ImageMixer 3 Launcher) will appear.
4 Click [Disc writing] and continue the operation on the computer
following the software’s indications.
See also ‘ImageMixer 3 SE Software Guide’.
IMPORTANT
• While the camcorder is connected to a computer, do not open the
memory card slot cover and do not remove the memory card.
•Observe the following precautions while the ACCESS indicator on the
camcorder is on or flashing. Failing to do so may result in permanent
data loss.
- Do not open the memory card slot cover.
-Do not disconnect the USB cable.
-Do not disconnect the power source or turn off the camcorder or the
computer.
Connecting to the DW-100 DVD Burner and Creating DVD Discs
1 Power the camcorder using the compact power adapter.
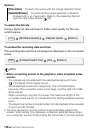
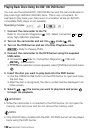
Operating modes:
INDEX SEL.
INDEX SEL.
4