5-10
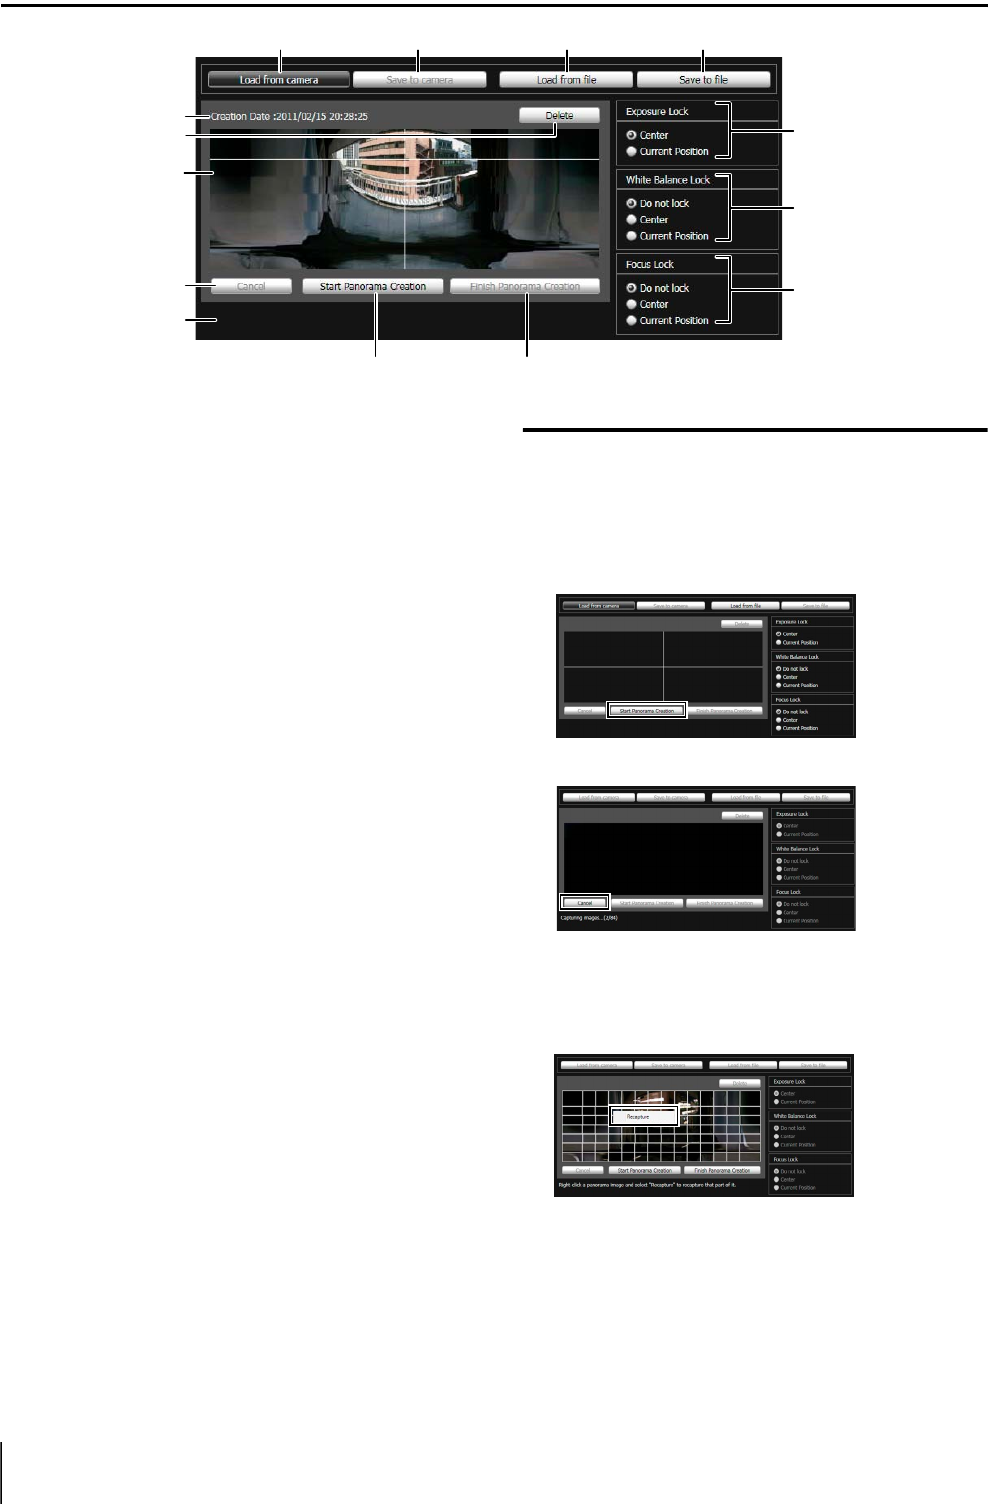
Display Screens of Panorama Creation Tool
1 [Load from camera]
Show the panorama image saved in the camera.
2 [Save to camera]
Save the currently shown panorama image in the
camera.
3 [Load from file]
Show JPEG files as a panorama image.
4 [Save to file]
Save the currently shown panorama image as a JPEG
file.
5 Creation date and time
Show the date and time a panorama image was
captured or loaded from a JPEG file.
6 [Delete]
Delete the currently shown panorama image.
7 Panorama Image Display Area
Show the panorama image.
8 [Cancel]
Stop the capture of a panorama image.
9 [Start Panorama Creation]
Start capturing a panorama image.
Aq [Finish Panorama Creation]
Confirm the captured panorama image.
Aa Status Display
Show the panorama image capturing status, such as
[Capturing image ], etc.
As [Exposure Lock]
Select [Center] or [Current Position] for the auto
exposure lock position.
Ad [White Balance Lock]
Set the white balance to [Do not lock], [Center], or
[Current Position].
Af [Focus Lock]
Set the focus to [Do not lock], [Center], or [Current
Position].
Capturing a Panorama Image
The capture is started.
Change the settings for [Exposure Lock], [White
Balance Lock], and [Focus Lock] as necessary.
To stop the capture in the middle, click [Cancel].
When you position the mouse pointer over the
panorama image, a white grid is shown. If you want to
recapture part of the panorama, position the pointer
inside the grid, right-click and select [Recapture].
To recapture an entire panorama image, click [Start
Panorama Creation] again.
5
6
7
8
Aa
9Aq
Af
As
Ad
1
Click [Start Panorama Creation].


