


5-24
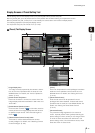
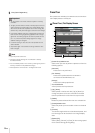
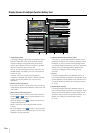
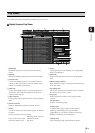
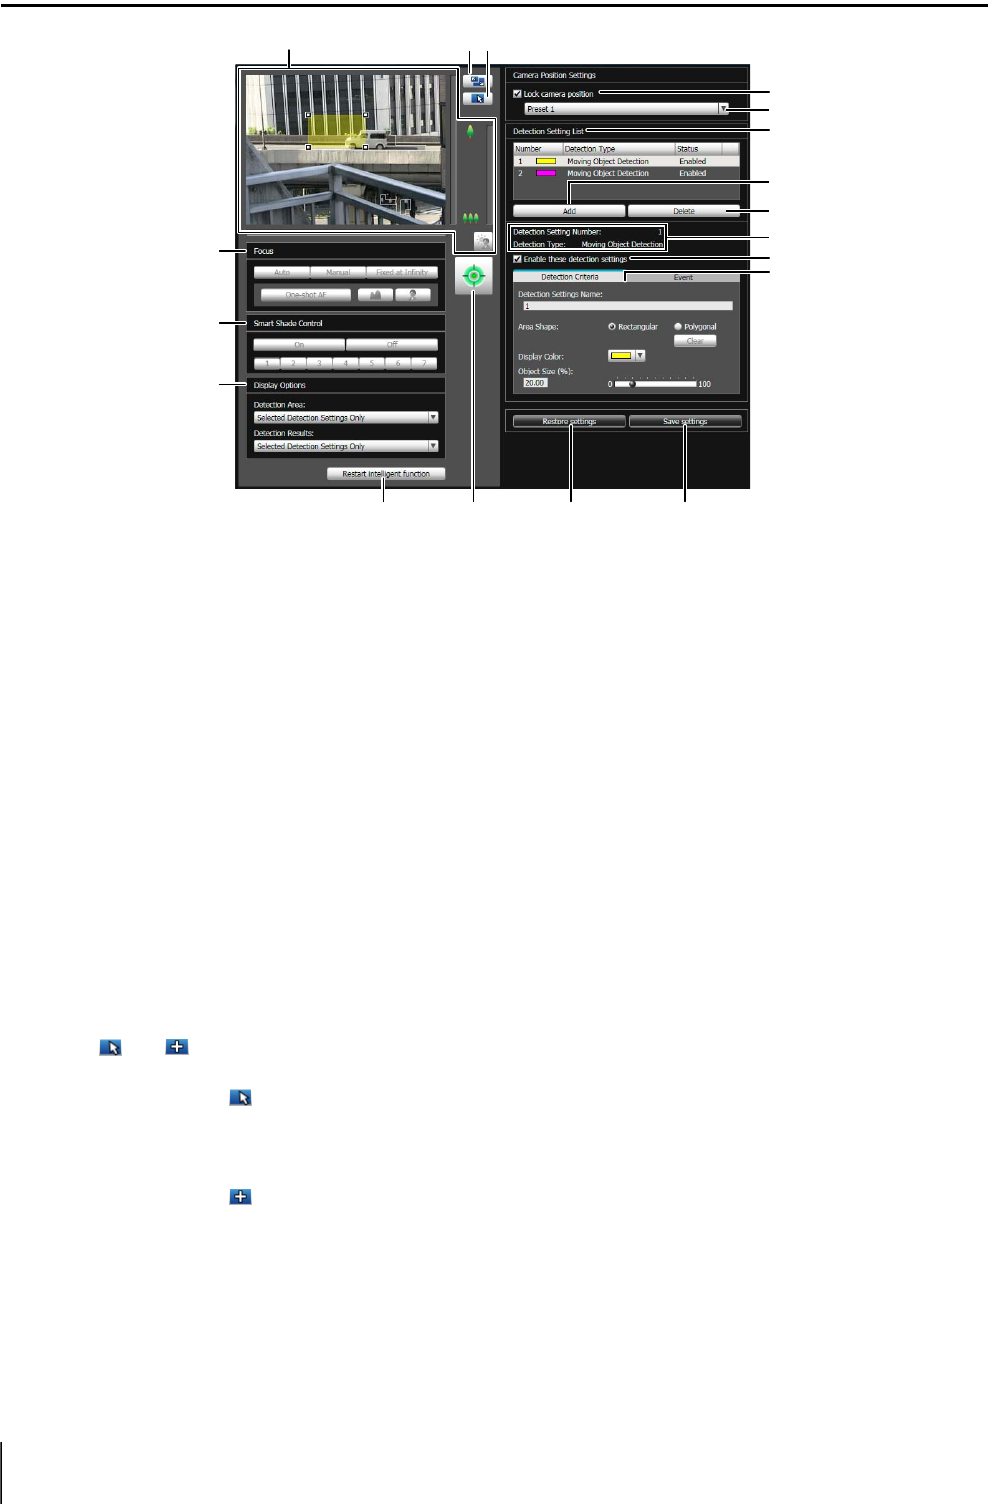
Display Screen of Intelligent Function Setting Tool
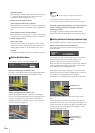
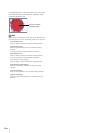
1 Image Display Area
The image currently captured by the camera is shown.
Detection areas are shown in translucently colored
frames (rectangle or polygonal). Drag to resize the
frames. Also, subjects for which movement has been
detected are shown with a contour line.
Pan, tilt, and zoom operations are the same as in the
VB-M40 Viewer. For details, see “How to Operate the
Viewer” (P. 6-5).
However, when the 9 [Lock camera position]
checkbox is selected, the camera is fixed at a preset
position and cannot perform pan, tilt, and zoom
operations.
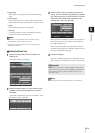
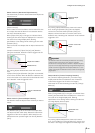
2 [Switch Screen Size] button
Each time this button is clicked, the screen size of the
image display area switches between “320 x 240” and
“640 x 480.”
3 [Switch Mouse Operation] button
Each time this button is clicked, the screen switches
between and , and the mouse operation in the
image display area changes.
When the button is set to , detection areas can be
created/resized/moved.
While in this mode, the camera orientation will not
change.
When the button is set to and the 9 [Lock camera
position] checkbox is not selected, pan, tilt, and zoom
operations can be performed.
4 [Obtain/release Camera Control] button
This button is used to obtain/release camera control
privileges. For details, see “Obtaining Camera Control
Privileges” (P. 6-6). If camera control privileges have
not yet been obtained elsewhere, such as in the Admin
Viewer, the control privileges will be obtained the
moment the Intelligent Function Setting Tool is
launched.
5 [Focus]
If control privileges have been obtained and the 9
[Lock camera position] checkbox is not selected, focus
can be operated. Focus operations are the same as in
the Admin Viewer. For details, see “Setting the Focus”
(P. 6-13).
6 [Smart Shade Control]
If control privileges have been obtained and the 9
[Lock camera position] checkbox is not selected, smart
shade control can be operated. Smart shade control
operations are the same as in the Admin Viewer. For
details, see “Setting the Smart Shade Control”
(P. 6-12).
1
Aj Ak4
8
7
6
5
Aq
Aa
As
Ah
Ad
Af
Ag
9
23