3-15
Cisco Video Surveillance 5010/5011 Indoor Fixed HD IP Dome Camera User Guide
OL-22669-02
Chapter 3 Operation
Imaging Tab
Selecting Auto Exposure Settings
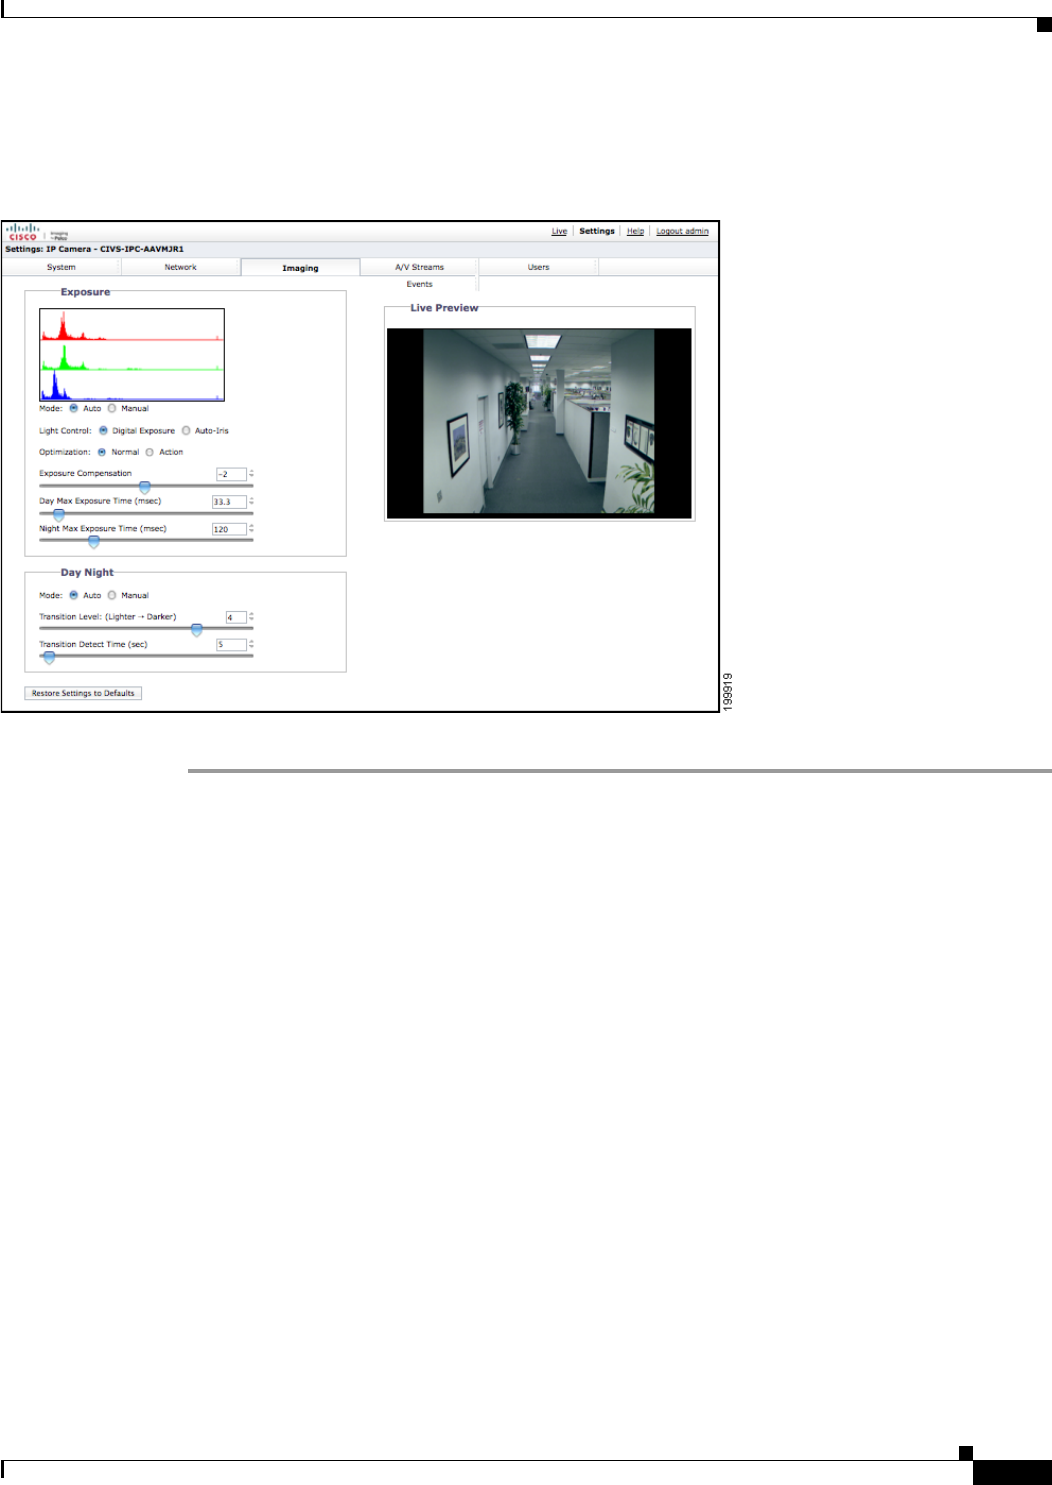
Figure 3-4 Auto Exposure Page
Step 1 Place your mouse pointer over the Imaging tab.
Step 2 Select Exposure from the drop-down menu.
Step 3 Select the Auto mode.
Step 4 Select the Light Control method: Digital Exposure or Auto-Iris Exposure.
• Digital Exposure: This setting automatically adjusts the sensor exposure time depending on the
light level at the scene. For very bright scenes, the exposure time is very short and, as the scene
becomes less bright, the exposure time is increased until the maximum exposure time is reached.
Digital Exposure is the default setting and provides the best image quality for the majority of scenes.
• Auto-Iris Exposure: This setting automatically adjusts the lens iris depending on the light level at
the scene. For this setting, the sensor exposure time is fixed. Select Auto-Iris if the video shows
flickering or rolling bands due to 50 Hz or 60 Hz lighting. Most lighting situations do not require
this setting.
Step 5 Select the Exposure Optimization setting: Normal or Action. These are optimizations of the Digital
Exposure control.
• Normal: This setting is for very bright scenes and exposure time is very short. As the scene becomes
less bright, the exposure time is increased until the maximum exposure time is reached. Normal is
the default setting.
• Action: This setting operates similar to Normal except the short exposure times are used for both
bright and mid-level lighting. This minimizes the blur in video caused by moving objects. For very
low light scenes, Action optimization operates the same as Normal, increasing the exposure time
until the maximum exposure time is reached.


