3-24
Cisco Video Surveillance 5010/5011 Indoor Fixed HD IP Dome Camera User Guide
OL-22669-02
Chapter 3 Operation
Imaging Tab
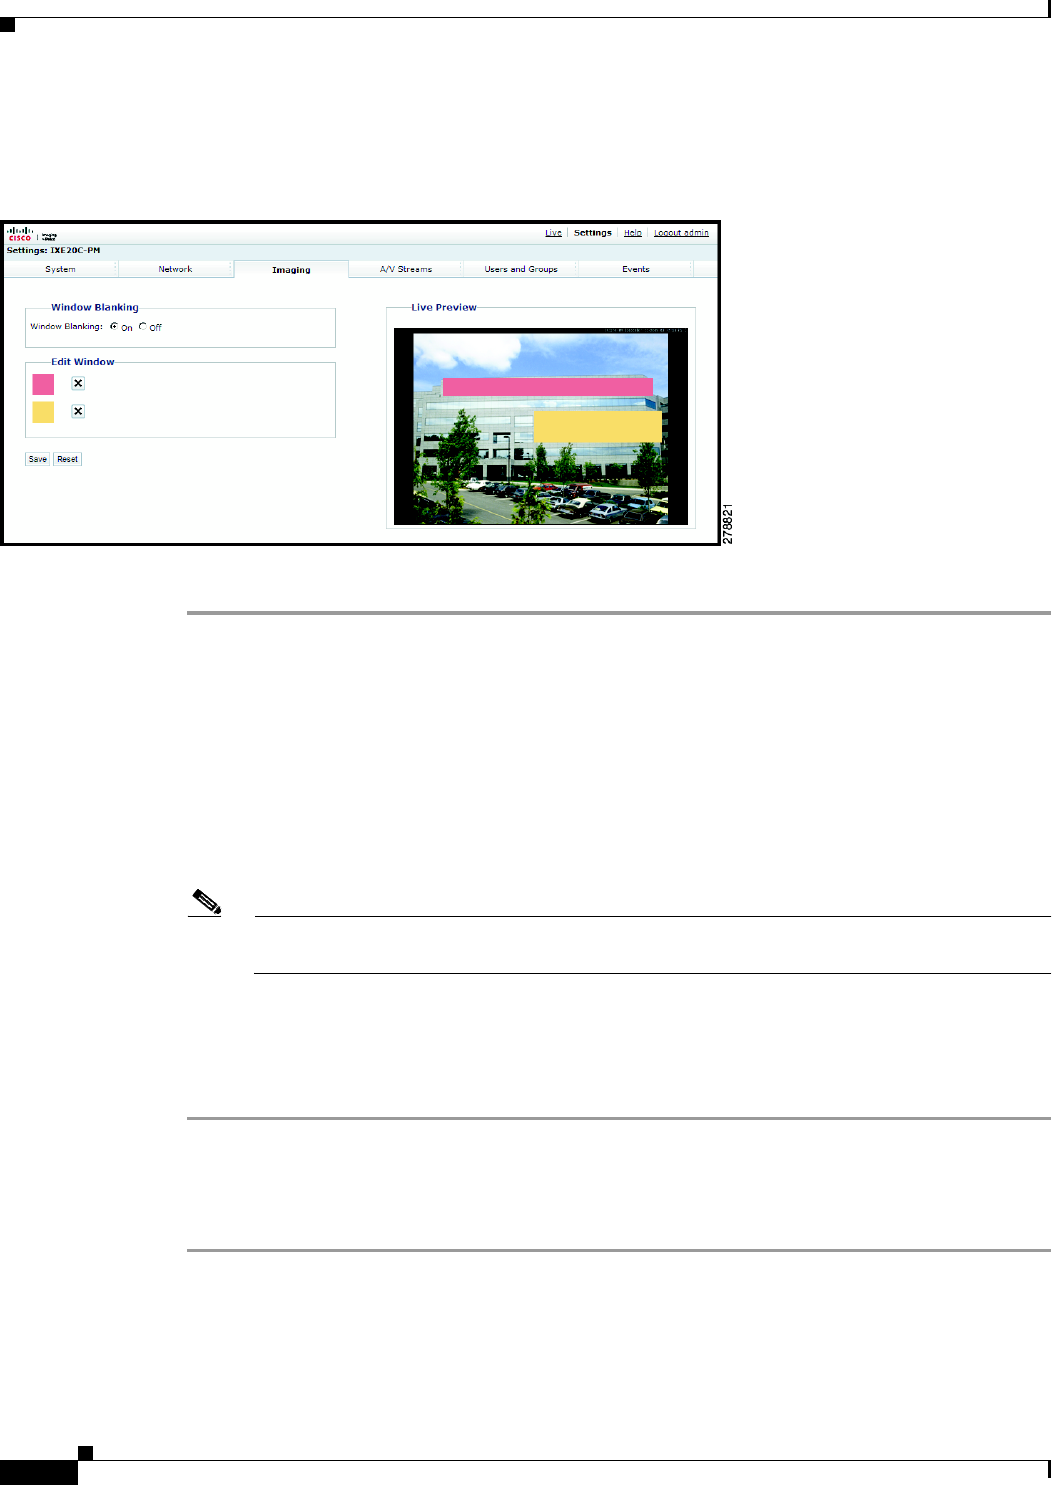
Turning On Window Blanking
Figure 3-11 Window Blanking Page
Step 1 Place your mouse pointer over the Imaging tab.
Step 2 Select Window Blanking from the drop-down menu.
Step 3 Select the On option for Window Blanking.
Step 4 Draw a window in the Live Preview area of the page:
a. Hold down the left mouse button.
b. Drag the mouse diagonally across the area you want to blank.
c. A color-coded box appears in the Edit Window section of the page that is the same color as the
window drawn in the Live Preview area.
Note Up to four blanked windows can be defined, but the blanked area cannot exceed 50 percent of
the field of view.
Step 5 To resize the window, click and drag one or more of the points until the window is the desired shape and
size.
Step 6 Click the Save button to save the settings, or click the Reset button to clear all of the information you
entered without saving it.
Turing Off Window Blanking
Step 1 Place your mouse pointer over the Imaging tab.
Step 2 Select Window Blanking from the drop-down menu.
Step 3 Select the Off option for Window Blanking.


