t 5IFCBUUFSZJOEJDBUJPOJTEJTQMBZFEPOUIF-$%NPOJUPS5IFJOEJDBUJPOUVSOTSFE
BOECMJOLTJGUIFSFNBJOJOHCBUUFSZQPXFSJTFYIBVTUFE3FDIBSHFUIFCBUUFSZPS
replace it with a fully charged battery.
t 8IFOUIFPQFSBUJOHUJNFPGUIFDBNFSBCFDPNFTFYUSFNFMZTIPSUFWFOBGUFS
QSPQFSMZDIBSHJOHUIFCBUUFSZUIFMJGFPGUIFCBUUFSZNBZIBWFFYQJSFE#VZB
new battery.
Battery status indication
t %JTDPOOFDUUIFDIBSHFS
t 5IFCBUUFSZDBNFSBCFDPNFT
warm after using/charging.
t 5IFCBUUFSZDBOCFDIBSHFEBU
any time, e.g. even if it is not
fully discharged.
t /FWFSNPEJGZUIFDIBSHFS
t $IBSHFUIFCBUUFSZXJUIUIF
dedicated charger indoors
only.
t
Battery cannot be charged
in the camera even if the
optional AC adaptor is at-
tached.
t 5IFHSFFOJOEJDBUPSnBTIFT
when the battery tempera-
ture is too high -> longer
charging time!
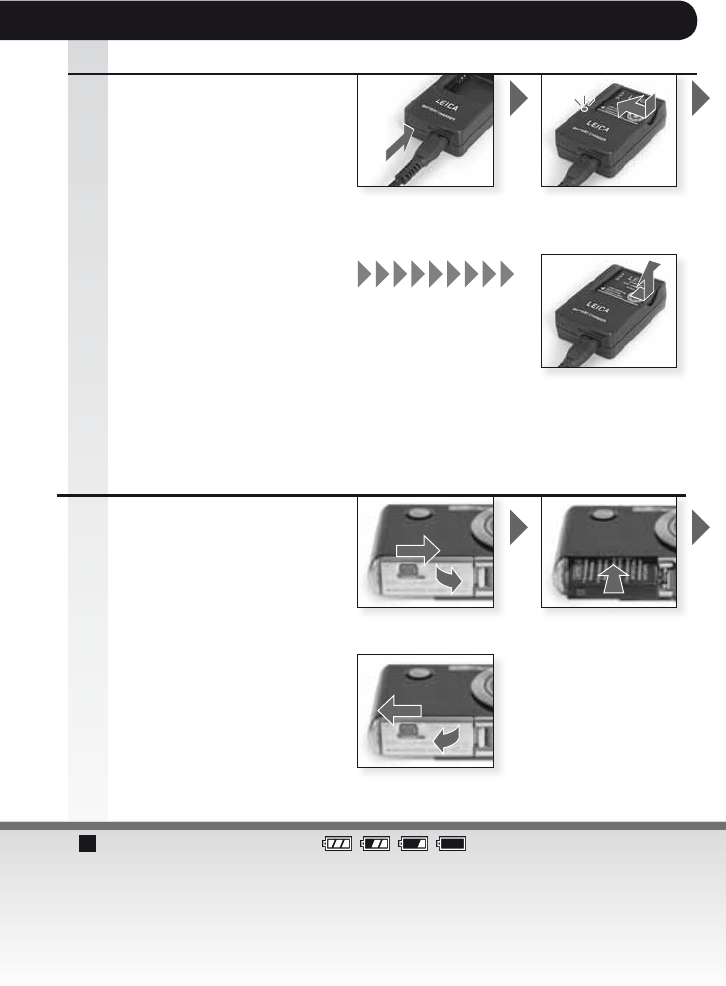
Charge until green
indicator turns off
(after about 120 min.)
Detach the batteryDetach the battery
Charging the battery
Connect adapter
(if outside USA)
Battery life according to CIPA standard:
~ 280 Recordable pictures
Insert the battery
Ensure battery is insert-
ed correctly.
t 3FNPWFUIFCBUUFSZBGUFSVTF
t /FWFSJOTFSUSFNPWFCBUUFSZ
while camera is ON.
t %POPUMFBWFBOZNFUBMJUFNT
(such as clips) near the con-
tact areas of the power plug.
Otherwise, a fire and/or elec-
tric shocks may be caused by
short-circuiting or the resulting
heat generated.
Ensure that the unit is turned
OFF.
Inserting the battery
Close the door
Lock the release lever
Open the door Insert the battery
Push until it clicks
The battery is not charged
when the camera is shipped.
3.
4.
15


