


4
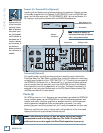
HDR 24/96
HDR 24/96
Introduction
Save your Box!
Uncle Jeff’s Bottom Ten Reasons to Save the Box:
10. You think boxes grow on trees?
9. It’s actually a time capsule, packed with a biological code that can’t be
decrypted until 2043.
8. Its festive graphics will cheer up those other boxes forgotten in your
attic.
7. Impress your friends: tape it up and pretend that you actually have two
HDR24/96s.
6. If you throw it away, bad people will know you have a studio in your
house.
5. Someday, when paper costs more than steel, it could net you a fortune.
4. The HDR24/96 itself only costs $47.95. The balance is what you paid for
the box.
3. Properly sealed, it can be used as a flotation device in the unlikely event
of a water landing.
2. It’s a great place to hide your old digital 8-track recorder.
1. If you collect ten HDR24/96 boxes, Greg will come over for dinner (this
offer does not apply to dealers or distributors).
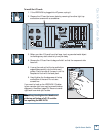
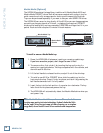
In the unlikely event that you should need to send the HDR24/96 back to Mackie
for service, please use the shipping box it came in. This box has been specially
designed to minimize damage to the HDR24/96 during shipping, so that it won’t
end up more broken than when you sent it.
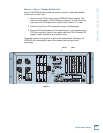
How To Use This Guide
Welcome to the cutting edge of affordable multitrack recording and editing! We
know you’re feeling eager, but please take a few minutes and read this brief Quick
Start Guide before you jump into your first HDR24/96 session. The first part of
this guide explains how to install and configure the various HDR24/96 I/O cards
and connect the HDR24/96 to an analog or digital console. The second part
describes how to start a session, operate the basic transport and monitoring
controls, and explains the terms and conventions used to name, store, and retrieve
projects on disk.
To get the most out of this guide, you’ll need to be familiar with the basic
multitrack recording process. To take advantage of the built-in Graphical User
Interface (GUI), you’ll need to attach a standard SVGA computer monitor, mouse,
and keyboard. This Quick Start Guide covers both front panel and GUI operation.
We have purposely excluded all the extra stuff from this guide to give you just the
basic information you need to get going right away. For step-by-step tutorials, in-
depth feature descriptions, and endless technical details, see the Applications and
Reference Manuals on the companion CD-ROM. Updated manuals and the latest
software releases can be obtained via Mackie’s website at: www.mackie.com.