42
HDR 24/96
HDR 24/96
Recording
All recording in the HDR24/96 is non-destructive. When you record over existing
audio, the old audio is not “erased” as it with magnetic tape; rather, new audio
files are created in addition to the existing files.
Recording can only take place on tracks that are “armed” for recording.
To arm tracks for recording:
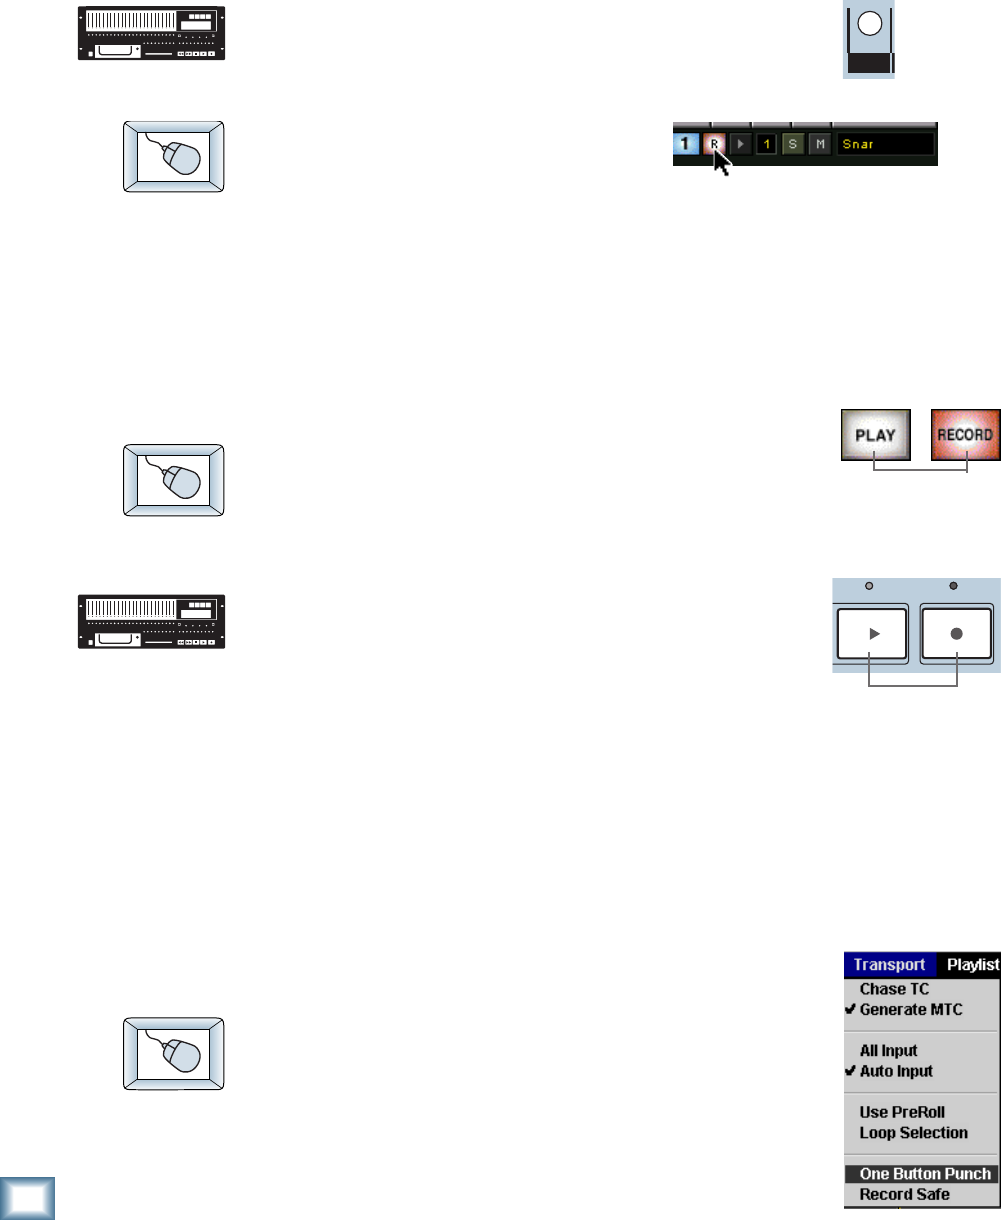
1. Press a track’s Record Ready button to arm the track.
2. Press it again to disarm the track.
1. Click a track’s Record Ready button
to arm the track.
2. Click it again to disarm the track. Click and drag across several Record
Ready buttons to arm a range of tracks.
The Record Ready LED/button blinks when a track is armed and ready to record,
and glows when the track is recording.
To record:
1. Arm one or more tracks.
2. Click Record.
3. Click any transport button other than Record to stop recording.
1. Arm one or more tracks.
2. Press Play and Record simultaneously.
3. Press any Transport button other than Record to
stop recording.
The Record LED glows when the HDR24/96 is recording and blinks when Record
is engaged with no tracks armed (master record standby mode). Pressing
Play+Record together is a holdover from analog tape days to prevent you from
accidentally erasing the tape (and making the producer really, really upset) with
an inadvertent button press. But since recording with the HDR24/96 is always
non-destructive, there is never a danger of accidental erasure! So, to save wear
and tear on your fingers, the HDR24/96 offers the option of One Button Punch.
One Button Punch affects only front panel and Remote operation, but not the GUI.
To enable One Button Punch:
♦
Select One Button Punch from the Transport
pulldown menu. One Button Punch remains enabled
until you de-select it again from the Transport menu.
1
REC
PLAY
RECORD