29
Enhancing Images
Image Adjustment
Enhancing Images
Before they will be ready for display or output on a monitor or printer, images captured from
the camera will usually need to be adjusted to a size and resolution appropriate to the task at
hand. Other settings, such as white balance, contrast, sharpness, luminosity, color brightness,
chroma, and hue, Photo Effects, Image Dust Off, D-Lighting, Red eye correction, fi sheye lens
settings, and automatic color settings for portraits or landscapes, may also require adjust-
ment. These ad just ments are performed using the image adjustment tool palettes.
Using the Tool Palettes
To display the default tool palettes, select Show Tool Palette 1, Show Tool Palette 2,
Show Tool Palette 3, or Color Balance Palette from the View menu.
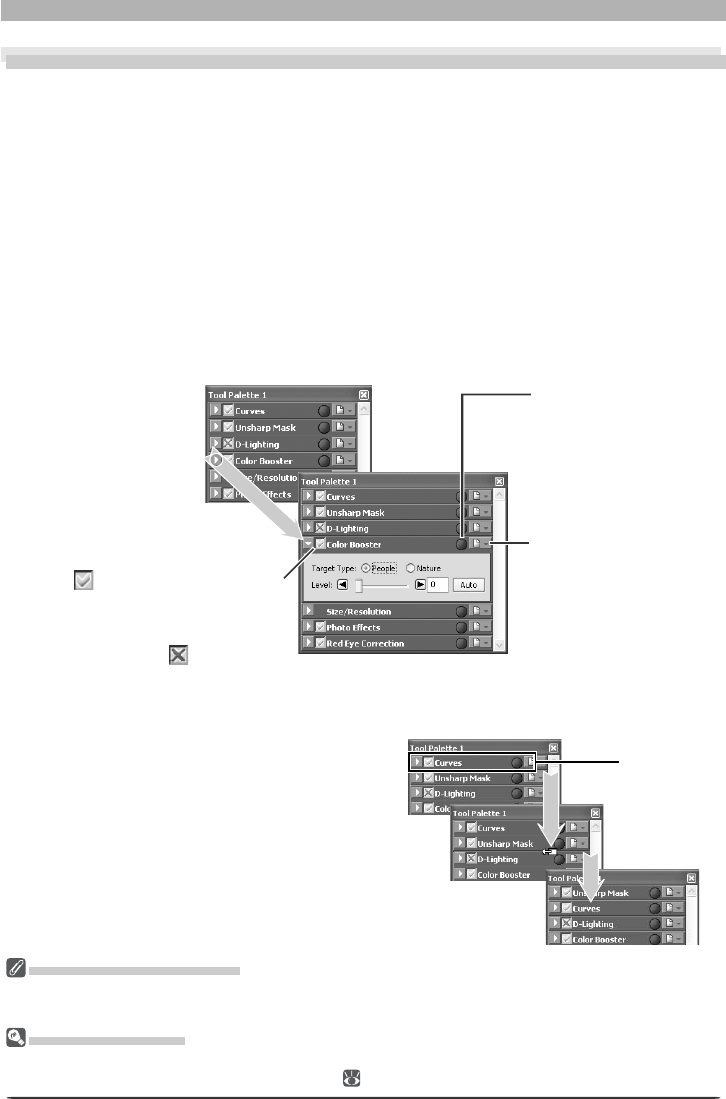
Displaying the Contents of a Tool Palette
To display or hide the contents of a tool palette, click the triangle to the left of the palette
title.
The Size / Resolu tio n Pal et te
The Size / Resolution palette does not have an Apply button. Changes to settings in the Size / Resolution
palette are always visible in the active window.
Third-Party Plug-Ins
Nikon Capture 4 supports third-party nik Color Efex Pro 2.0 plug-ins that add a fi lter palette to Tool
Palette 2. More information is available on-line ( 2).
Changing Palette Order
To change the order of palettes in the tool
palette window, click a tool palette title bar
and drag it into a new position.
Settings Menu Button
Click this button to dis-
play the settings sub-
menu, where palette
settings can be saved,
loaded, or reset.
Apply Button
Changes to settings only take effect
when the palette Apply button is
checked (except in the D-Light-
ing, vignette control, and fi sheye
lens palettes, the Apply button is
checked by default). If the Apply
button is crossed out , the effects
of the settings in the palette will
not be visible in the image win dow.
Edit Indicator
This indicator turns
green if palette settings
have been modifi ed for
the image in the active
window.
Title bar
