


Chapter 5 Adjustments and Settings 105
Chapter 5 Adjustments and Settings
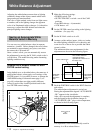
Menu 101 Setting the Real Time
Clock and Calendar
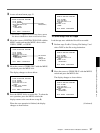
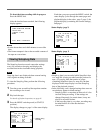
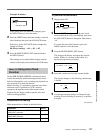
1 Display menu 101 and press the SHIFT button.
The current calendar setting appears in the setting
mode format (yyyymmdd).
Example: October 8, 2000
Note
The first two digits of the year setting cannot be
directly changed.
2 Use the SHIFT and ADVANCE buttons to set the
desired date.
If there are no more new settings to be made, go
directly to step 5.
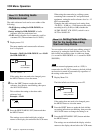
3 Press the SHIFT button while the date display is
blinking (Example: 200010
08).
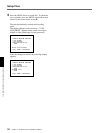
The current time (real time clock) setting is
displayed.
Example: 10:15:05 PM
4 Use the SHIFT and ADVANCE buttons to set the
current time.
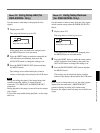
5 Press the RESET/(MENU SET) button.
This starts the clock advance operation.
6 Press the MENU button.
This returns the display window to the display
shown before the VCR menu.
The date set can be displayed in the time value
indication (see page 62) in the following way.
On the DSR-500WSL: Displayed in mmddyyyy
format (Example: 10081999)
On the DSR-500WSPL: Displayed in ddmmyyyy
format (Example: 08101999)
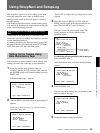
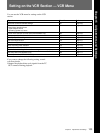
Menu 201 Checking the Total
Operating (Power-On) Hours
1 Display menu 201 and press the SHIFT button.
Pressing the SHIFT button cycles through the
following display items.
2 Check the indication, then press the RESET/
(MENU SET) button, and then the MENU button.
This returns the display window to the display
shown before the VCR menu.
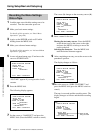
Menu 204 Selecting Frame Mode
(DF/NDF) for Time Code (for
DSR-500WSL Only)
Select frame modes when setting the time code.
Drop-frame mode (factory setting): When adjusting
the discrepancy between time code value and real
time
Non-drop-frame mode: When you need not adjust
the discrepancy between time code value and real
time
For details of time code settings, see page 64.
Blinking
Blinking
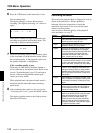
Indication Example
Head drum operating hours A 0492Hr
Tape transport hours b 0480Hr
Total operating hours C 0835Hr
Menu number 201 0492
221505
(Continued)
20001008