


110 Chapter 5 Adjustments and Settings
Chapter 5 Adjustments and Settings
VCR Menu Operation
Menu 213 Selecting Audio
Reference Level
The audio reference level can be set to either of the
following.
–20 dB (factory setting for DSR-500WSL) or
–18 dB
(factory setting for DSR-500WSPL): Audio
reference level for professional use
–12 dB: Audio reference level commonly used for
consumer DV (The maximum level is 0 dB.)
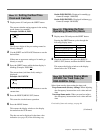
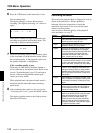
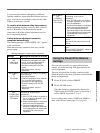
1 Display menu 213.
The menu number and current audio reference
level is displayed.
Example: –20 dB (for DSR-500WSL) or –18 dB
(for DSR-500WSPL)
a) For DSR-500WSPL: –18
If the setting does not need to be changed, press
the MENU button to close the menu.
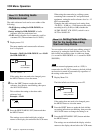
2 Press the SHIFT button to make the audio
reference level display start blinking, then press
the ADVANCE button.
This switches the setting to the other audio
reference level.
Example: –12 dB
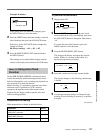
3 Press the RESET/(MENU SET) button and then
the MENU button.
The settings are recorded and display window
returns to the display shown before the VCR menu.
When using the camcorder in a editing system
containing both consumer DV and professional
equipment, setting the audio reference level to –12
dB is recommended.
Changing the audio reference level setting from
–20 dB (or –18 dB) to –12 dB increases the audio
recording level by 8 dB (or 6 dB) whether the
AUDIO SELECT (CH-1/CH-2) switch is set to
AUTO or MANUAL.
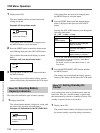
Menu 214 Setting Fade-In/Fade-
Out for the Audio Recording
Start and Stop Points
You can reduce noise at back space editing points (if
necessary) by setting the fade-in/fade-out to on. The
fade-in/fade-out transition time is within one frame
(
1
/30 second for DSR-500WSL or
1
/25 second for DSR-
500WSPL).
Note
When an external equipment, such as a VCR, is
connected to the DV OUT connector, the fade-in/fade-
out function is turned off automatically regardless of
the setting on the menu 214.
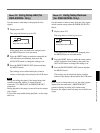
1 Display Menu 214.
The fade-in/fade-out is factory-set to oFF.
If the setting does not need to be changed, press
the MENU button to close the menu.
2 Press the SHIFT button to make the fade-in/fade-
out setting indication start blinking, then press the
ADVANCE button to change the setting to on.
3 Press the RESET/(MENU SET) button and then
the MENU button.
The settings are recorded and the display window
returns to the display shown before the VCR menu.
a)
Audio reference
level indication
Blinking
Blinking
Blinking
Fade-in/fade-out
setting indication
213 -20
213 -12
214 oFF