


101
Custom Picture Settings
Simplified Graphical Interface
In addition to the very detailed settings explained in the previous section (A 95), the camcorder offers a more
intuitive graphical interface for adjusting the gamma curve and white balance settings. Instead of remembering
numeric values, you can see how your changes affect the gamma curve or white balance shift right on the
screen.
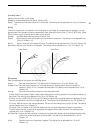
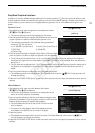
Gamma Curve
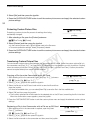
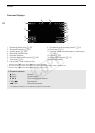
1 After selecting a file, open the gamma curve adjustment screen.
[,/Edit File] > [Gamma]
• The current gamma curve will be displayed on the screen.
2 Push the joystick left/right to highlight the [M] field and then push the
joystick up/down to select the desired basic gamma curve.
• The numbers correspond to the [Gamma] settings explained
previously (A 95), as follows:
1 to 4: [Normal 1] to [Normal 4] 5 and 6: [Cine 1] and [Cine 2]
7: [EOS Std.] 8: [Wide DR]
9: [Canon Log]
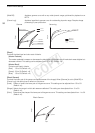
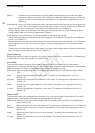
3 Push the joystick left/right to highlight the [H] field or [L] field and then
push the joystick up/down to adjust the gamma curve as necessary.
• The [L] value can be adjusted from 1 to 9. It is equivalent to the [Black Gamma] setting and controls the
lower part of the gamma curve (dark areas of the image). This setting is not available when the [M] value is
set to 8 or 9.
• The [H] value can be adjusted from 1 to 5. It is equivalent to the [Knee] setting and controls the upper part of
the gamma curve (highlights of the image). This setting is not available when the [M] value is set to 5 or
higher.
4 Push the joystick left/right to select [Set] and then press the joystick.
• The adjusted gamma curve will be saved. The [Gamma] value under the [ / Fine Tuning] submenu will
change accordingly.
5 Press the CUSTOM PICTURE button to exit the custom picture menu and apply the selected custom picture
settings.
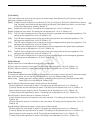
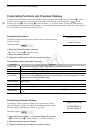
White Balance
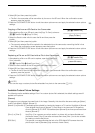
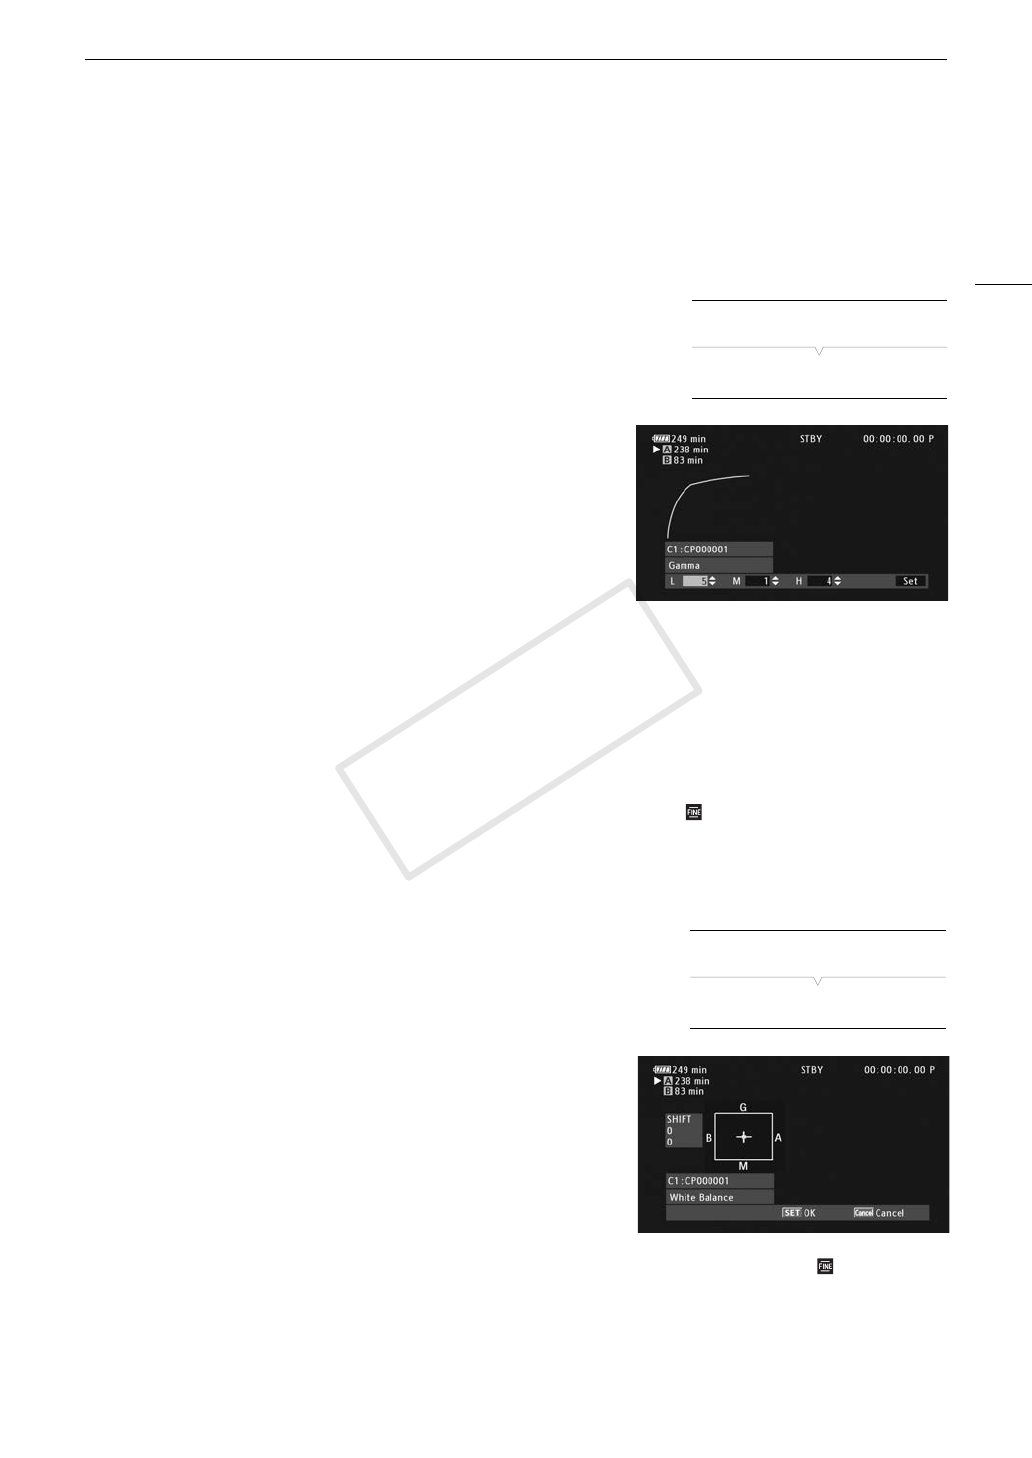
1 After selecting a file, open the white balance shift screen.
[,/Edit File] > [White Balance]
• The current white balance is shown as an orange point at the
center of the WB correction coordinates.
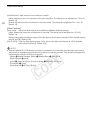
2 Push the joystick left/right to shift the white balance along the blue
(B)/amber (A) gradation. Push the joystick up/down to shift the white
balance along the green (G)/magenta (M) gradation.
• The white balance shift can be set to one of 9 levels in each
color's direction.
• The amount of white balance shift will be displayed as two
coordinates in the [SHIFT] box to the left of the graph.
3 Press the joystick.
• The adjusted white balance shift value will be saved. The [White Balance] value under the [ / Fine
Tuning] submenu will change accordingly.
4 Press the CUSTOM PICTURE button to exit the custom picture menu and apply the selected custom picture
settings.
[,/Edit File]
[Gamma]
[,/Edit File]
[White Balance]
COPY