


1
2
3
4
5
6
7
8
9
10
11
Cover
Preliminary Notes
and Legal Information
Contents: Basic
Operations
Advanced Guide
Camera Basics
Using GPS
Function
Auto Mode/
Hybrid Auto Mode
Other Shooting
Modes
Tv, Av, and M
Mode
Playback Mode
Wi-Fi Functions
Setting Menu
Accessories
Appendix
Index
Basic Guide
P Mode
143
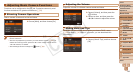
Sending Images to a Computer via
CANON iMAGE GATEWAY
Images on the memory card that have not been transferred already can be
sent to a computer via CANON iMAGE GATEWAY.
If the computer that you intend to send images to is turned off, the images
will be stored temporarily on the CANON iMAGE GATEWAY server.
However, the images will be deleted after a while. Start up the computer so
that they can be saved.
1 Choose the type of images
to send (only when sending
movies with images).
Press the <n> button, and then
choose [Wi-Fi Settings] on the [3] tab
(=
35).
Press the <o><p> buttons or turn the
<5> dial to choose [Send via Server],
and then press the <q><r> buttons to
choose [Stills/Movies].
When sending only still images, go to
step 2.
• You can also choose images in step 2 by pressing the zoom lever twice toward
<k> to access single-image display and then pressing the <q><r> buttons or
turning the <5> dial.
• In step 3, you can choose the resolution (size) to resize images to before
sending (=
142).
Adding Comments
Using the camera, you can add comments (alphanumeric characters and
symbols) to images that you send to email addresses, social networking
services, etc. The number of characters and symbols that can be entered
may differ depending on the Web service.
1 Choose [ ].
Press the <o><p><q><r> buttons or
turn the <5> dial to choose [
], and
then press the <m> button.
2 Add a comment.
Follow step 3 in “Registering a Camera
Nickname (First time only)” (=
126) to
add a comment.
3 Send the image.
Follow the steps in “Sending Images”
(=
141) to send the image.
• When a comment is not entered, the comment set in CANON iMAGE
GATEWAY is automatically sent.
C OPY