


41
1
2
3
4
5
6
7
8
9
10
11
Cover
Preliminary Notes
and Legal Information
Contents: Basic
Operations
Advanced Guide
Camera Basics
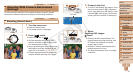
Using GPS
Function
Auto Mode/
Hybrid Auto Mode
Other Shooting
Modes
Tv, Av, and M
Mode
Playback Mode
Wi-Fi Functions
Setting Menu
Accessories
Appendix
Index
Basic Guide
P Mode
41
1
2
3
4
5
6
7
8
9
10
11
Cover
Preliminary Notes
and Legal Information
Contents: Basic
Operations
Advanced Guide
Camera Basics
Using GPS
Function
Auto Mode/
Hybrid Auto Mode
Other Shooting
Modes
Tv, Av, and M
Mode
Playback Mode
Wi-Fi Functions
Setting Menu
Accessories
Appendix
Index
Basic Guide
P Mode
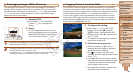
Logging Camera Location Data
You can keep a record of where the camera was taken by using location
information acquired from GPS satellite signals over a period of time. Daily
locationandtimedataisloggedtoale,separatefromimagedata.Logles
can be reviewed on the camera (=
43), and with the software (=
21),
youcanuseloglestofollowtheroutetakenwiththecameraonamap.
Note that the GPS logger will reduce battery life, because some power is
consumed even when the camera is off. Charge the battery as needed, or
keep a spare charged battery with you.
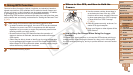
1 Congurethesetting.
Follow step 1 (=
40) in “Using GPS
Function” to choose [
], press the
<l> button, and then choose [On]
(either press the <q><r> buttons or turn
the <5> dial).
To restore the original setting, repeat this
process but choose [Off].
2 Finish the setup process.
When you press the <m> button, a
message about the logger is displayed.
Be sure to read the message.
The [ ] icon shown with your shots
indicates the GPS reception status at that
time (=
40).
The logger function will operate, and the
date, time and location information based
on signals acquired from GPS satellites
will be logged to the camera.
The logger will continue to function even
when the camera is turned off.
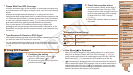
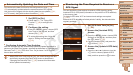
Geotagging Images While Shooting
The still images and movies you shoot can be geotagged, automatically
adding latitude, longitude, and elevation information. You can review the
recorded location information on the camera (=
103). Using the software
(=
21), you can also view the locations on a map, with the still images
and movies shown next to them.
1 Activate GPS.
Follow steps 1 – 2 in “Using GPS
Function” (=
40)tocongurethe
setting.
2 Shoot.
The still images and movies you shoot
are now geotagged, and you can review
the location information as described in
“GPS Information Display” (=
103).
•In addition to geotagging your shots, you can also tag shots with the
shooting date and time (=
103) in UTC format (=
44).
• Geotagging applies the initial camera location and shooting date and time, as
acquired when you begin shooting a movie.
• For digest movies (=
49), geotagging applies the initial camera location and
shootingdateandtimeasacquiredfortherstmoviethatday.
C OPY