


88
1
2
3
4
5
6
8
9
10
Cover
Preliminary Notes and
Legal Information
Contents: Basic
Operations
Camera Basics
Creative Shot
Mode
Auto Mode/
Hybrid Auto Mode
Other Shooting
Modes
Playback Mode
Setting Menu
Accessories
Appendix
Index
Basic Guide
P Mode
7
Advanced Guide
Wi-Fi Functions
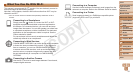
Accessing the Wi-Fi Menu
Initial Connection via Wi-Fi
First, register a nickname for the camera, if you have not already named it.
This nickname will be displayed on the screen of target devices when
connecting to other devices via Wi-Fi.
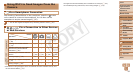
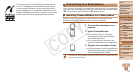
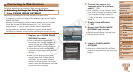
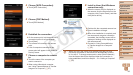
1 Access the Wi-Fi menu.
Press the <1> button to turn the camera
on.
Touch [ ].
[ ] will be displayed during single-image
display. It will not be displayed in index
display.
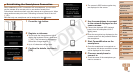
2 Access the keyboard.
Touch inside the frame shown at left.
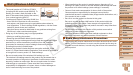
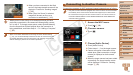
3 Enter a nickname.
Touch characters on the keyboard to
enter them.
Up to 16 characters can be used.
Touch [
q
][
r
] to move the cursor.
Touch [ ] to enter capital letters.
Touch [ ] to enter numbers or symbols.
Touch [ ] to delete the previous
character.
Touch [^], and then touch [OK].
The Wi-Fi menu is displayed.
• When connecting wirelessly to any device other than a computer, a memory
card must be inserted in the camera. Additionally, the memory card must
contain images in order for you to access Web services or connect to a
smartphone or printer wirelessly.
• To change the camera’s nickname, choose [Wi-Fi Settings] on the [3] tab, and
then choose [Change Device Nickname].
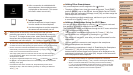
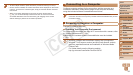
After the Initial Wi-Fi Connection
Once you have connected to other devices via Wi-Fi, recent device names
willbelistedrstwhenyoutouch[ ]. Simply choose the device name to
connect again.
You can register new devices by dragging left or right to access the device
selection screen.
• If you prefer not to display recent target devices, touch [
H
] and then
[
n
], and on the [3] tab, choose [Wi-Fi Settings] > [Target History] > [Off].
C OPY