


91
1
2
3
4
5
6
8
9
10
Cover
Preliminary Notes and
Legal Information
Contents: Basic
Operations
Camera Basics
Creative Shot
Mode
Auto Mode/
Hybrid Auto Mode
Other Shooting
Modes
Playback Mode
Setting Menu
Accessories
Appendix
Index
Basic Guide
P Mode
7
Advanced Guide
Wi-Fi Functions
When you have connected to the Web
service, the image transfer screen will be
displayed. Proceed to “Sending Images”
(=
99).
When [Send via Server] is selected,
images will be sent as soon as a
connection is established (=
101).
•When you are in the vicinity of an access point that you have
previously connected to, the camera will automatically connect
to it in step 2. To change access points, select [Switch Network]
from the screen that will be displayed when the connection is
being established, and follow steps 4 – 5 in “Adding a Computer”
(=
95).
• When a connection destination is set using the Touch Actions setting
(=
76), you can automatically access the function to connect to the last
connected destination from the next time by just dragging on the screen
without needing to perform the connection operation.
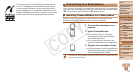
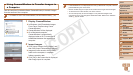
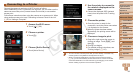
Connecting to Another Camera
Connect two cameras via Wi-Fi and send images between them as follows.
• OnlyCanon-brandcamerasequippedwithaWi-Fifunctioncanbeconnected
to wirelessly. Even Canon-brand cameras that support Eye-Fi cards cannot
be connected to if they do not have a Wi-Fi function. You cannot connect to
PowerShot SD430 DIGITAL ELPH WIRELESS/DIGITAL IXUS WIRELESS
cameras with this camera.
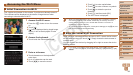
1 Access the Wi-Fi menu.
Touch [ ] (=
88).
2 Choose a camera.
Touch [4].
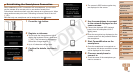
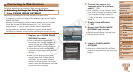
3 Choose [Add a Device].
Touch [Add a Device].
Follow steps 1 – 3 on the target camera.
Camera connection information will be
added when [Start connection on target
camera] is displayed on both camera
screens.
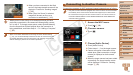
When the target camera has been added
successfully, the image transfer screen
will be displayed. Proceed to “Sending
Images” (=
99).
C OPY