


3-15
Cisco Video Surveillance 4300 and 4500 High-Definition IP Cameras User Guide
OL-19609-04
Chapter 3 Configuring and Managing the IP Camera
Feature Setup Windows
To display the Patrol Sequence window, access the configuration windows as described in the
“Performing the Initial Setup of the IP Camera” section on page 2-5, click Feature Setup, then click
Patrol Sequence.
If you change any options in this window, you must click the Save Settings button to save the change.
If you do not click this button, changes are not retained when you exit the window. Save Settings
appears at the bottom of the window. You may need to scroll down to it.
Table 3-8 describes the option in the Patrol Sequence window.
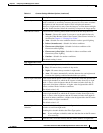
Table 3-8 Patrol Sequence Window Options
Option Description
Patrol Sequence Area
Dwell Time Choose the length of time in seconds that the camera remains in each preset
position when a patrol sequence executes.
Available list
Selected list
Configure the order in which the IP camera executes up to 8 steps in a patrol
sequence. The Available list displays preset positions that you can use in the
patrol sequence. You define these preset positions in the Camera
Video/Control window. The Selected list displays the steps in the patrol
sequence.
When the patrol sequence executes, the IP camera goes to the first preset
position in the Selected list, then moves through each position in the list in
order. It remains in each position for the time that is defined in the Time
Delay field. It stops at the last position in the list.
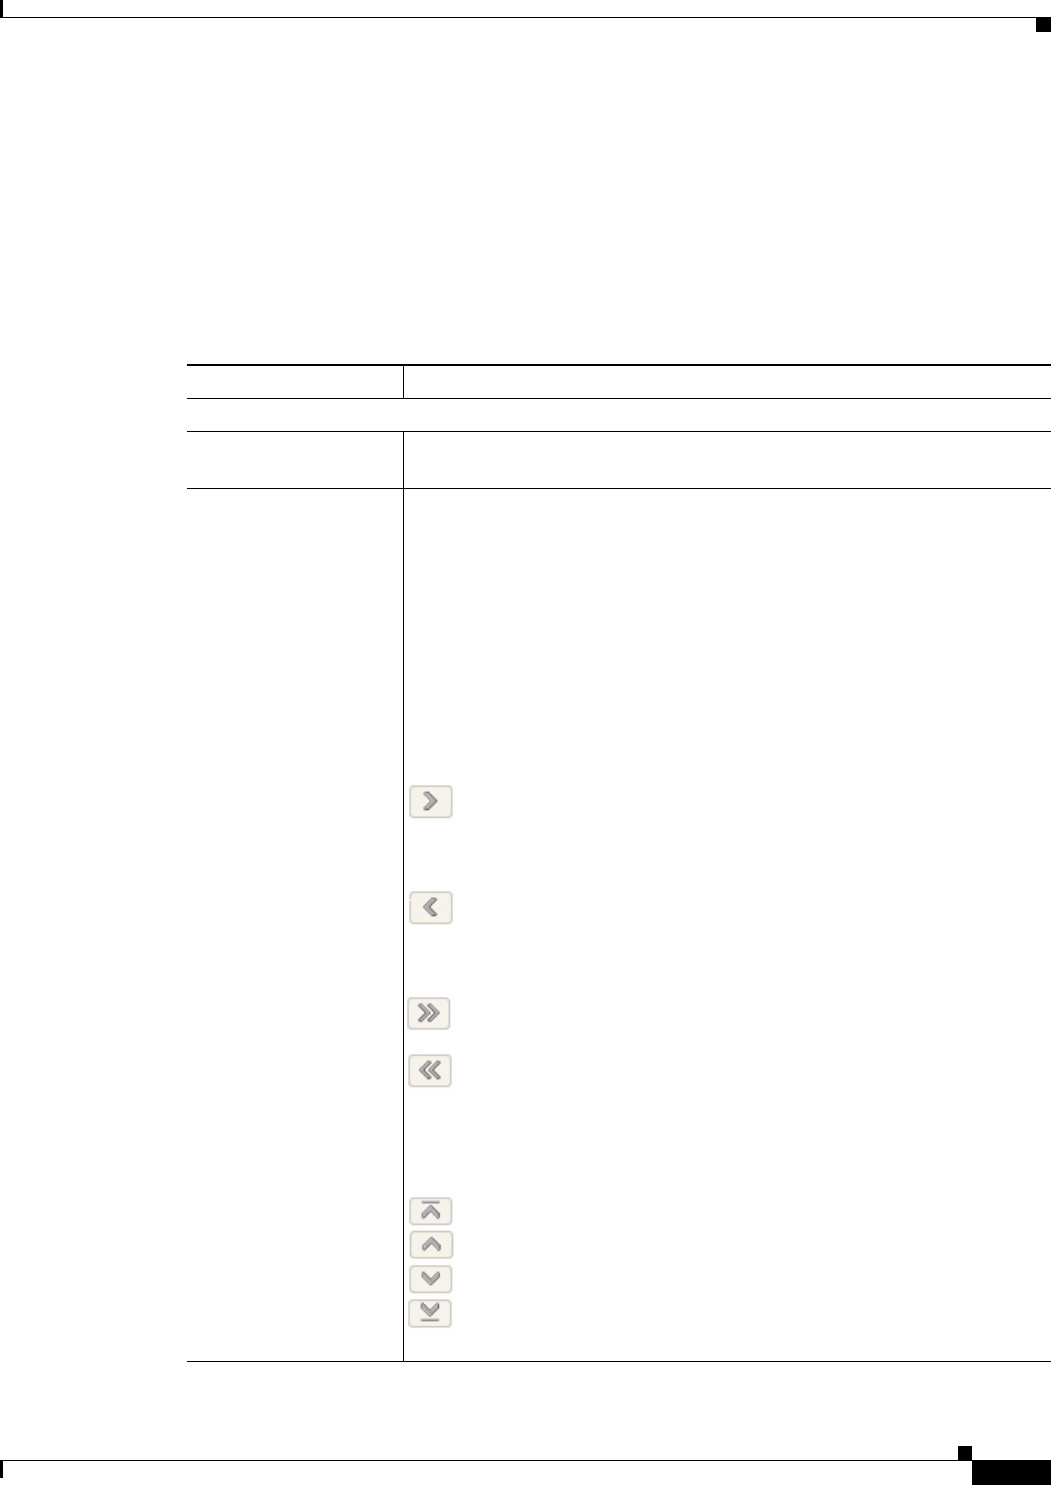
To move preset positions between the Available list and the Selected list, use
the following buttons. Buttons become highlighted when they are available.
—Move the selected preset position or positions from the Available
list to the Selected list. To select a preset position, click it to
highlight it. To select more than one preset positions, Ctrl-click
each one.
—Move the selected preset position or positions from the Selected
list to the Available list. To select a preset position, click it to
highlight it. To select more than one preset positions, Ctrl-click
each one.
—Move all preset positions from the Available list to the Selected
list.
—Move all preset positions from the Selected list to the Available
list.
To configure the order of steps in the Selected list, use the following buttons.
Buttons become highlighted when they are available. To select a preset
position, click it to highlight it.
—Move the selected preset position to the top of the list.
—Move the selected preset position up one position.
—Move the selected preset position down one position.
—Move the selected preset position to the bottom of the list.