


4
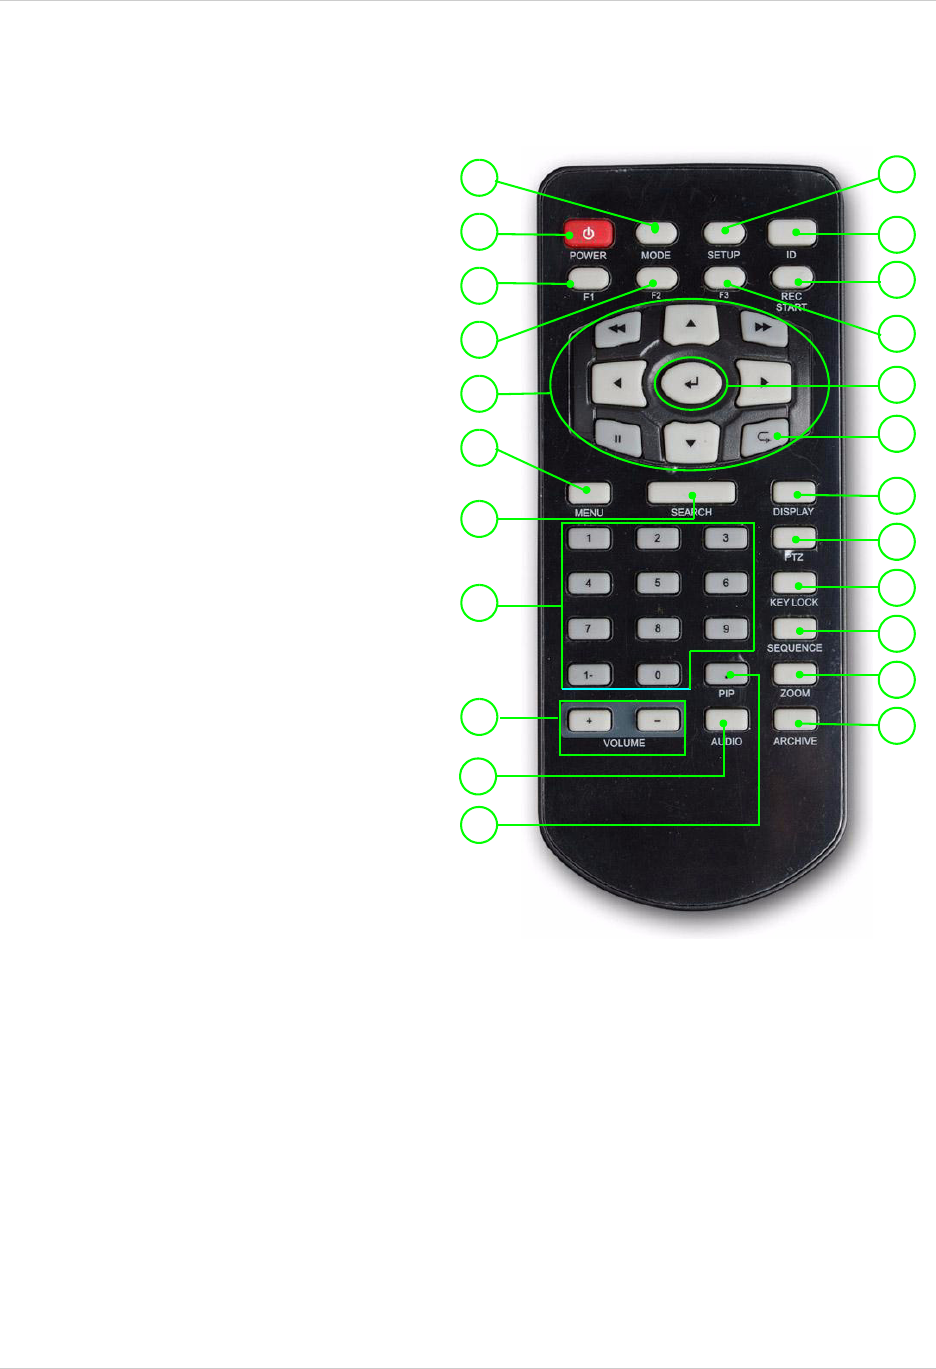
Remote Control
Remote Control
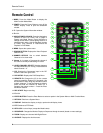
1. MODE: Press the Mode Button to display the
Multi-Function Mode Menu.
1
2
3
4
5
6
7
8
9
12
13
14
16
17
18
19
20
21
22
15
23
10
11
2. POWER: Press the Power Button to turn off the
Monitor Display. Press to open the Shutdown
window.
3. F1: Opens the System Information window.
4. F2: N/A.
5. NAVIGATION/PLAYBACK: Press the Navigation
Controls to move Up, Down, Left or Right in
System and Mode menus. Press Up/Down to
change values while in active editing mode for a
selected menu option. Use the Playback controls
to Pause, Play, Reverse or Fast-forward the
Playback in DVR Mode.
6. MENU: Opens the system menu.
7. SEARCH BUTTON: Displays the Video Playback
Search menu.
8. NUMBER KEYPAD: Use to switch between
Cameras in live view mode.
9. Volume +/-: Increase or Decrease the volume of
the camera currently broadcasting live audio.
10. AUDIO CHANNEL SELECT: Switches between
live audio channels (CH1~4 only). Press Audio and
select Channel 1~4.
11. PIP: Displays the Component Input in the PIP
Screen in the lower right corner.
12. DVR SETUP: Displays the DVR Setup Menu.
13. REMOTE ID: Changes the ID for the remote
control to match the System ID (if changed). Use
the Remote ID when using one remote to control
multiple systems). To set the Remote to default,
press and hold the Remote ID button for 5
seconds, then select number 1. Press the Enter
and Return buttons.
14. REC START: Begin recording.
15. F3: N/A.
16. ENTER BUTTON: Press the Enter Button to select an option in the System Menu or Multi-Function Menu.
17. RETURN: Exits from a System Menu.
18. DISPLAY: Switches the display to single, quad and multi-display views.
19. PTZ: Switches to PTZ Mode.
20. KEYLOCK: Locks all keys (except the Mode button).
21. SEQUENCE: Changes the Monitor Display to Sequence through channels (based on menu settings).
22. ZOOM: Displays one channel with Digital Zoom.
23. ARCHIVE: Displays the Archive menu.