


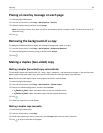


Adding a network folder shortcut
1 On your computer, create a shared folder with read/write access.
2 On a Web browser, type your printer IP address, and then press Enter.
3
Navigate to either of the following:
• Settings > Scan‑to‑Network Folder Setup
• Settings > Manage Shortcuts > Add New Shortcut > Scan to Network
4
Enter the necessary information, and then click Add.
Note: To avoid unsaved changes to your settings, make sure the network folder shortcut name is different from that
of your folder name.
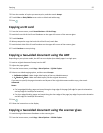
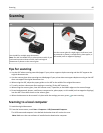
Scanning a two‑sided document using the ADF
Depending on your printer model, the ADF can scan duplex (two-sided) pages in a single pass.
1
Load an original document faceup into the ADF.
2
Adjust the paper guides.
3
From the home screen, touch Scan.
4
Follow the instructions on the display, and then set the other scan options. If necessary, touch Accept each time
you make a selection.
Note: From the Sides menu in Scan Options, make sure you select 2‑Sided, and then touch Accept.
5 Press .
6 Follow the instructions on the display.
The scan is complete when a message appears on the printer control panel indicating that the file you scanned has
been saved.
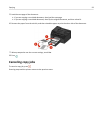
Scanning to a flash drive or memory card
Before you begin, make sure your flash drive or memory card is not write‑protected.
1
Load the original document.
2
From the home screen, touch Scan > Memory Device.
3
Insert the flash drive or memory card.
Notes:
•
The printer reads only one memory device at a time.
•
If a flash drive is inserted into the USB port while a memory card is in the card slot, then a message appears
on the display prompting you to select which memory device to use.
4 Select the output file type you want to create.
5 Set the color, quality, original image size, and the other scan options. If necessary, touch Accept each time you
make a selection.
Scanning 62