


26
GB
Digital Photo Printer -DPP-FP50_GB_UC2/CED/CEK/AU_ 2-599-949-11(1)
Notes
• For how to preset images for printing, see the
manual of your digital camera.
• Some types of digital camera do not support
the DPOF function, or the printer may not
support some of the functions of the digital
camera.
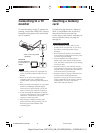
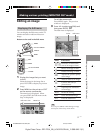
Using the remote commander
2
1
1
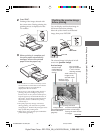
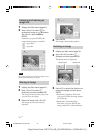
Press AUTO PRINT repeatedly to
display “INDEX”, “DPOF”, or
“ALL” on the TV monitor.
The image to be printed will be
displayed with orange frames.
AUTO PRINT indication
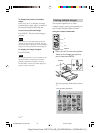
To cancel selection (INDEX/ALL
only)
Press g/G/f/F to move the yellow
frame to the image of which you want
to cancel selection in the image list
and press CANCEL.
The orange frame disappears and the
selection is canceled.
Note
You cannot cancel the selection of the
DPOF preset images.
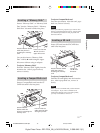
2
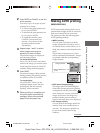
Press PRINT.
Printing starts. During printing, the
printing process is displayed on the
TV monitor.
To stop printing
Press CANCEL. When you are
printing multiple copies, the next
printing after the one currently
printing will be cancelled.
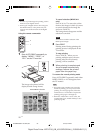
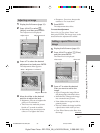
3
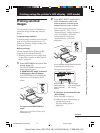
When printing is complete and
the print paper automatically
emerges, remove the printed
paper from the paper tray.
To resume the normal printing mode
Press AUTO PRINT repeatedly until either
INDEX, DPOF, or ALL disappears from
the TV monitor.
Tips
• Even if the print cartridge runs out in the
middle of printing, you can proceed with
printing. If a message appears, follow the
instructions on a TV monitor to replace the
printing pack (pages 11 through 15).
• When the “Date Print” is set to “ON”, the
recorded date (year, month and day) is also
printed (page 50).
001GBFP5005TV1-UC/CED.p65 3/11/05, 4:22 PM26