60
GB
Digital Photo Printer -DPP-FP50_GB_UC2/CED/CEK/AU_ 2-599-949-11(1)
Note
In case the installation window is not
automatically displayed, double-click the
“Setup.exe” of the CD-ROM.
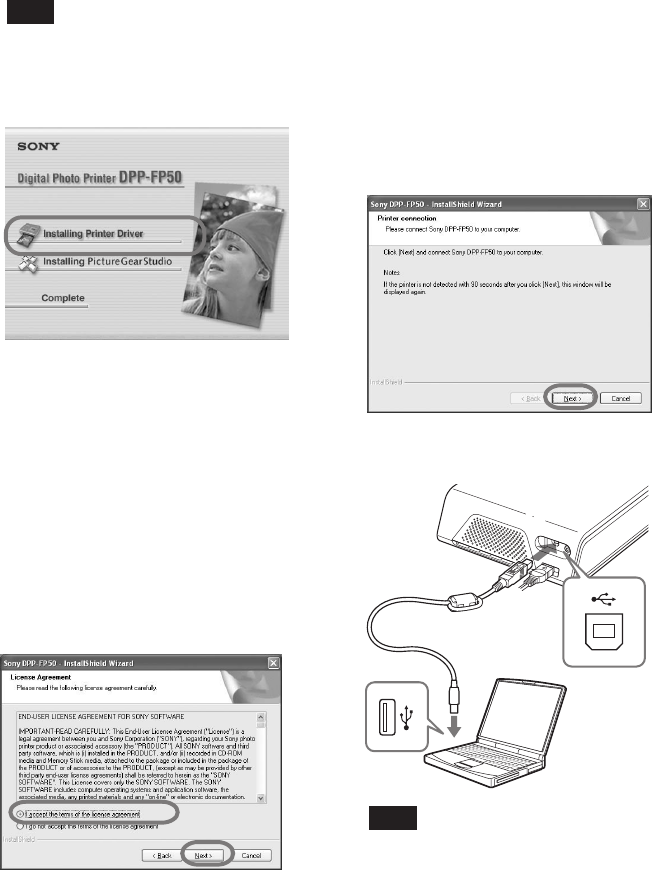
4 Click “Installing Printer Driver”.
The “Sony DPP-FP50 -
InstallShieldWizard” dialog box
appears.
5 Click “Next”.
The license agreement dialog box is
displayed.
6 Check “I accept the terms of the
license agreement” and click
“Next”.
If you check “I do not accept the
terms of the license agreement”, you
cannot proceed to the next step.
The “Ready to install the program”
dialog box is displayed.
7 Click “Install”.
The “Printer connection” dialog box is
displayed.
Windows PC
To USB
connector
To USB
connector (B-
TYPE)
8
Connect the printer to the AC
power source (page 17).
9
Press ON/STANDBY to turn on the
printer (page 17).
The ON/STANDBY indicator of the
printer lights in green.
10
Click “Next”.
11
Connect the USB connectors of
the printer and your computer.
Note
The print paper emerges from the paper
outlet a few times during printing. Do not
block the paper outlet with the USB
connecting cable.
The printer automatically enters the
PC mode and the printer setup will
start automatically.
When the printer setup is complete,
the “InstallShield Wizard Complete”
dialog box is displayed.
001GBFP5011PC-UC/CED.p65 3/11/05, 4:23 PM60


