65
GB
Printing from a PC (PC mode)
Digital Photo Printer -DPP-FP50_GB_UC2/CED/CEK/AU_ 2-599-949-11(1)
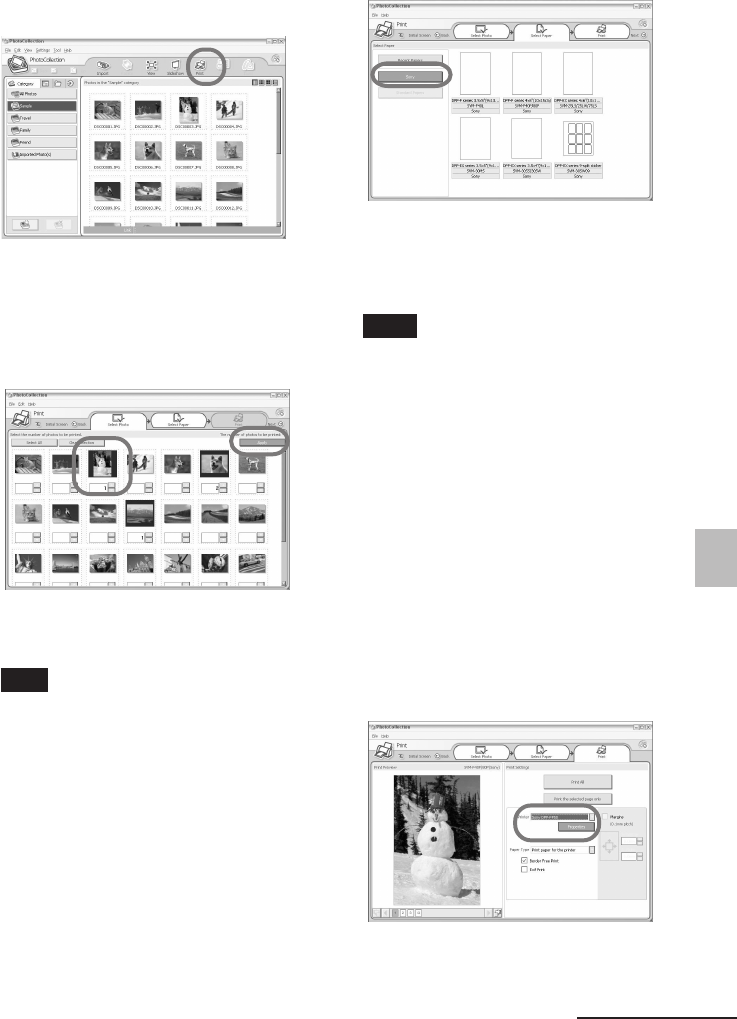
4 Click “Print.”
The Print dialog box is displayed.
5 Select the photos that you want
to print, set the number of copies
to be printed for each photo, and
then click “Apply”.
The print paper selection dialog box is
displayed.
Note
Make sure to set the print quantity in this
dialog box. Even if you set the number of
copies in “Paper/Output” tab of the “Sony
DPP-FP50 Properties” dialog box, the print
quantity will not be reflected.
6 Click “Sony”, and then select the
DPP-F series paper size of the
paper you use.
• DPP-F series 4 x 6“ (Postcard size)
SVM-F40P/F80P
• DPP-F series 3.5 x 5”
SVM-F40L
Notes
• In some regions, 3.5 x 5 inch size print
paper (SVM-F40L, DPP-F series) is not
sold.
• If you select paper other than the DPP-
F series paper, you cannot obtain
proper printing results.
• When you use the supplied printing
pack, select “DPP-F series 4 x 6” SVM-
F40P.
When you select the paper size, the
print dialog box is displayed.
7 In the “Printer” drop-down list
box, select “Sony DPP-FP50” and
then click “Properties”.
In the “Printer” drop-down list box,
select the printer that you actually
use.
Continued
001GBFP5011PC-UC/CED.p65 3/11/05, 4:23 PM65


