46
GB
Digital Photo Printer -DPP-FP50_GB_UC2/CED/CEK/AU_ 2-599-949-11(1)
2 Press g/G/f/F to select the
desired message, then press
ENTER.
The color selection window for the
message is displayed.
3 Press g/G/f/F to select the
desired color, then press ENTER.
The selected message is placed in
the message area.
7
Enter characters.
Press g/G/f/F to select the
characters area, then press ENTER.
The keyboard is displayed. For how
to enter characters, see
“Superimposing characters” on pages
35 to 36.
8
After you enter and adjust the
characters, press f/F to select
“Execute”, then press ENTER.
The characters are fixed to the image.
9
Check the preview, then save and
print your Creative print.
For saving and printing an image, see
page 38.
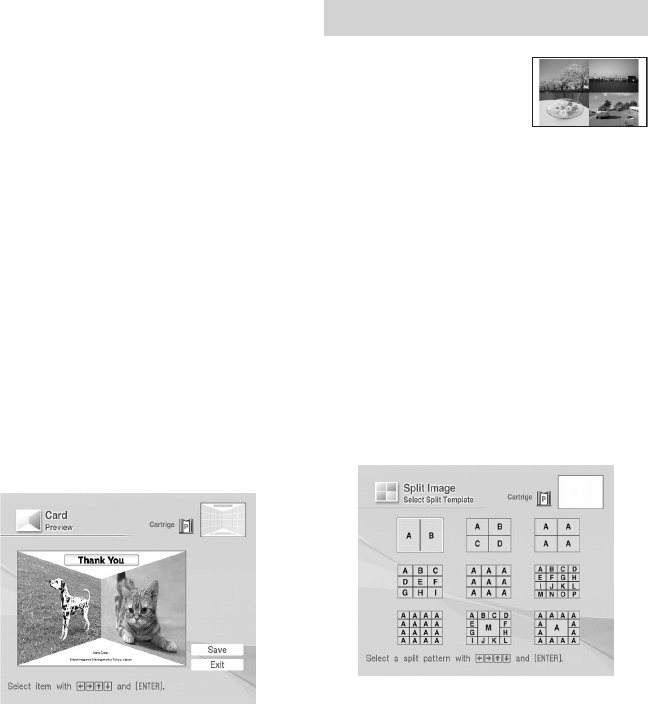
Making split images
You can make a print
with 2-split, 4-split, 9-
split, 13-split, or 16-
split images.
(The 13-split and 16-split images are
available only with the “Postcard size”.)
1
Display the Creative Print menu
(page 39).
2
Press g/G/f/F to select “Split
Image”, then press ENTER.
The print size selection window is
displayed (page 40).
3
Press g/G to select the print size,
then press ENTER.
The split image templates are
displayed.
001GBFP5008TV3-UC/CED.p65 3/11/05, 4:22 PM46


