


AXIS 2100 User’s Guide Quick Network Installation Procedure
Quick Network Installation Procedure
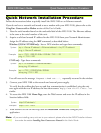
Follow the instructions below to quickly install the AXIS 2100 on an Ethernet network.
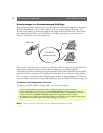
If you do not have a network and intend to use a modem with your AXIS 2100, please refer to the
UsingYour Camera with a Modem section of this User’s Guide.
1. Note the serial number found on the underside label of the AXIS 2100. The Ethernet address
is the same as the serial number of the unit.
2. Acquire a valid and unused IP address for the AXIS 2100 from your Network Administrator.
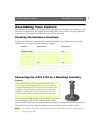
3. Connect your AXIS 2100 to the network and external power supply.
Assign the IP address using the ARP command, as described below:
Windows 95/98 & NT/2000 only - Start a DOS window and type these commands:
UNIX only - Type these commands:
You will now see the message ‘Request timed out...’, repeatedly returned in the window.
To verify that the address has been set and that communication is established, ping the unit
once again with the new IP address; the host then returns: ‘Reply from 172.21.1.200...’ or
similar.
4. To access the AXIS 2100 Home Page, start the Web browser and enter the IP address in the
location/address field
:
5. With reference to the on-line help, start the Installation Wizard and configure your
application.
Note:
•If you are installing many units on to your network, please refer to the AXIS IP Installer informa-
tion under the section Installing Your Camera on a Network in this User’s Guide.
Syntax: arp -s <Server IP address> <Ethernet address> <my PC IP address>
ping -t <Server IP address>
Example: arp -s 172.21.1.200 00-40-8c-10-00-86 172.21.1.193
ping -t 172.21.1.200
Syntax: arp -s <IP address> <Ethernet address>
temp ping <IP address>
Example: arp -s 172.21.1.200 00:40:8c:10:00:86
temp ping 172.21.1.200
Syntax: http://<IP address>/
Example: http://172.21.1.200/