


Choosing Your Application AXIS 2100 User’s Guide
18
Installation and Configuration Overview
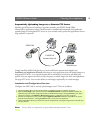
Configure the AXIS 2100 to upload images to an Internet Service Provider, as follows:
Notes: •By configuring the AXIS 2100 to accept incoming calls, you can at any time refine or amend the
product configuration remotely via a Dial-up connection - or locally, either from the Ethernet
network or via a computer connected via the supplied Null Modem Cable.
•You can refine your application using the Web-based Administration Tools.
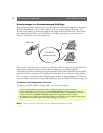
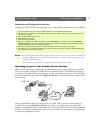
Uploading Pre/Post Alarm Images to Your Internet Service Provider
Perfect as a remote imaging and light surveillance tool, the AXIS 2100 can not only transmit live
video streams over a standard Dial-up connection, but can also be connected to a wide variety of
standard external alarm devices. It can be quickly configured for uploading single images, or
pre/post alarm image sequences, to a Public or Private ISP when a time or alarm-based event
occurs.
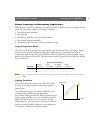
Using the available Wizards, you set the times and the frequency at which images are taken and
uploaded to your ISP. You can also arrange for e-mail alerts containing the alarm image buffer and
a link to the camera.
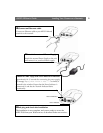
1. Connect the AXIS 2100 to the network if available. Otherwise, use the supplied Null Modem Cable.
2. Install the camera as a modem. For this and general information on the Dial-up connection, refer to Using Your Camera
with a Modem, on page 26.
3. Create a dedicated Dial-up connection.
4. Refine the Dial-up parameters.
5. Initiate the Dial-up connection.
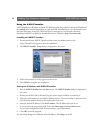
6. Referring to Configuring Your Camera, on page 35, open the Home Page in your browser and start the Installation
Wizard. Complete the Wizard to establish the standard Security, Date and Time, Image General Layout and Modem settings
- selecting modem as your chosen method of connection.
7. Continue the configuration using the Application Wizard to define your preferred ISP and mode of operation -
choosing Sequential mode to upload an image sequence that is unlimited or restricted between specified time periods,
but independent of any alarm event.
8. Disconnect the camera from the network or Null Modem Cable and connect it directly to your modem.
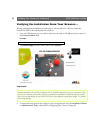
9. Your application is now complete. You should now verify the installation by remotely accessing the images now stored
with your ISP.