Using EPSON Photo!3
2-15
R4C5700
Rev. C
A5 size PHT3.FM
4/6/01 Pass 0
R
Proof Sign-off:
K. Pipa _______
M. Fujimori _______
R. Thomson _______
2
The major difference between the Folder menu and
the Camera menu is that from the Folder menu you
browse for folders that contain images that were
previously downloaded or saved. Also, you can
upload EPSON Photo file format photos from your
computer to your camera using the
Upload/Copy
button.
Note:
EPSON Photo file format image files are saved as JPEG files,
which are formatted according to Exif Version 2.1 standards
and are recorded using the "Design rule for camera file
system." Exif is a standard format for audio/image files. The
"Design rule for camera file system" is a recording standard
for image files. These standards have been established by the
Japan Electronic Industry Development Association
(JEIDA).
Locating the folder that contains your photos
Click the
Browse
button to open a dialog box from
which you can locate the folder that contains your
downloaded images or images that you have
converted into the EPSON Photo file format. Specify
the appropriate folder and click
OK
.
Note:
To convert images into the EPSON Photo file format, see
“Using EPSON File Converter” on page 3-1.
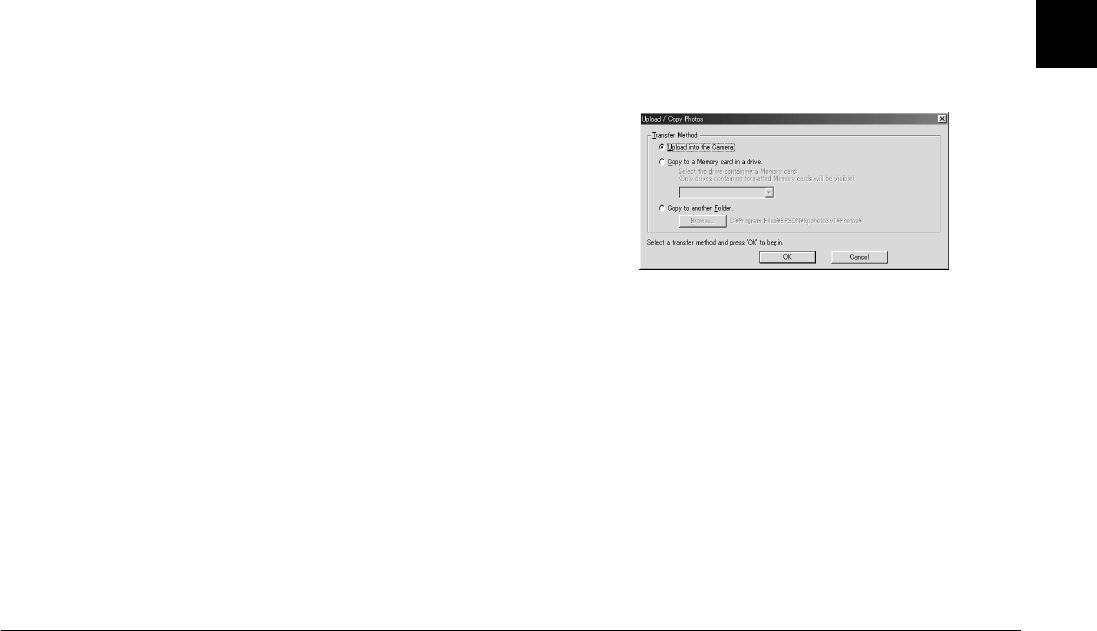
Uploading and copying photos
Click the
Upload/Copy
button to upload selected
photos to a memory card installed in your computer
or camera. Using this button, you can also copy photos
and video clips to another folder on your computer.
The following dialog box appears.
Select the transfer method. If you choose to copy
images to another folder, specify which folder using
the
Browse
button.
Click the
OK
button. Images are transferred in the
order in which they are displayed in the image
selection window. To cancel the file transfer, click the
Cancel
button.
If the images that you select to upload or copy have
audio recordings attached, you can choose to upload
or copy both the photos and audio recording files, or
just the photos.
