Using the Included Utilities
3-3
R4C5700
Rev. C
A5 size CONVERTR.FM
4/6/01 Pass 0
R
Proof Sign-off:
K. Pipa _______
M. Fujimori _______
R. Thomson _______
3
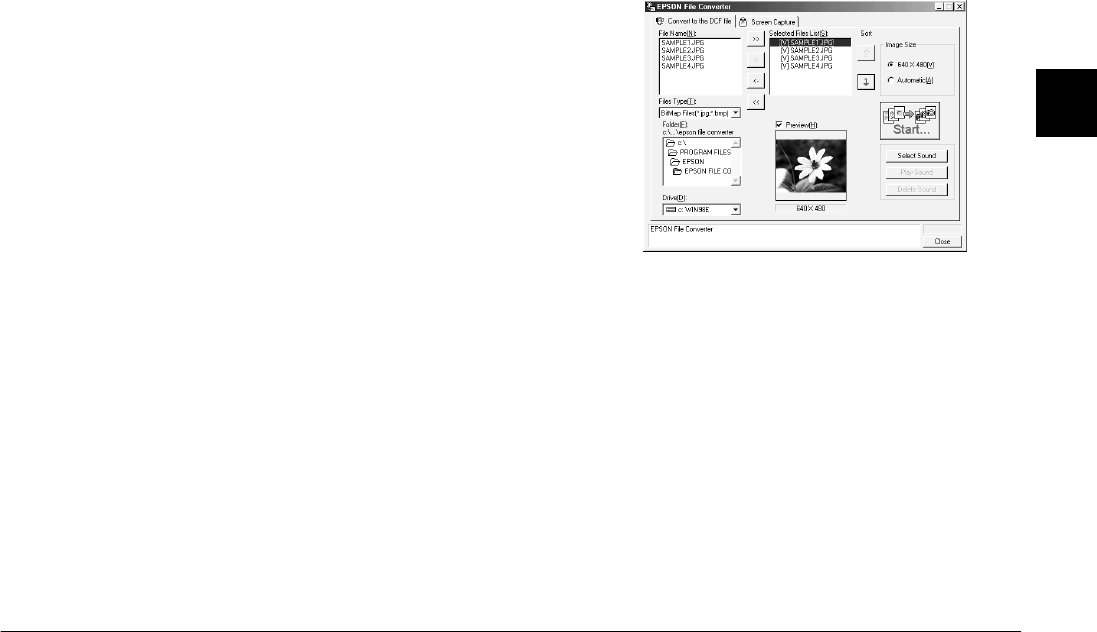
3. Select an image that you want to convert from the
File Name list. Then click the
->
button. Repeat
this procedure until all of the files that you want
to convert are shown in the Selected Files List. If
you want to convert all of the images in the File
Name list, click the
>>
button.
To remove a file from the Selected Files List, click
the <- button. To remove all of the files from this
list, click the << button.
To change the order in which the files will be
saved on your camera’s memory card when you
upload them to your camera using EPSON
Photo!3, select the image that you wish to move,
then click the
↑
or
↓
Sort arrow.
Note:
To preview the selected image and confirm its size,
select the
Preview
check box.
4. For each file that is displayed in the Selected Files
List, select an image size from the Image Size box.
To convert and save the selected image at a size
of 640
×
480 pixels, select
640 × 480.
To have EPSON File Converter automatically
assign an image size to the image when it is
converted and saved, select
Automatic
. EPSON
File Converter automatically chooses one of the
three sizes listed below, selecting the size that
most closely matches the size of the original
image.
640
×
480 pixels
1600
×
1200 pixels
2048
×
1536 pixels


