3-10
Using the Included Utilities
L
Proof Sign-off:
K. Pipa _______
M. Fujimori _______
R. Thomson _______
R4C5700
Rev. C
A5 size CONVERTR.FM
4/6/01 Pass 0
7. When you are ready to save the selected files on
your computer, click the
Start
button, then select
the folder in which you want to save the files. The
name of the currently selected folder appears in
quotations next to
Select
on the button at the
bottom of the dialog box.
8. Click the
Select
button. The files are converted
and saved in the specified folder.
You are now ready to upload your files to the memory
card in your camera using EPSON Photo!3. For
instructions on uploading your files, see “Using the
Folder Menu” on page 2-14.
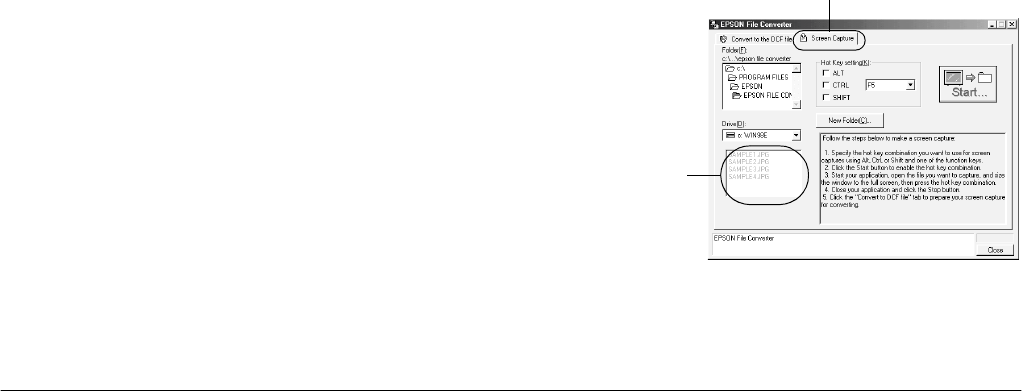
Making screen captures
You can make screen captures, or screen shots, of the
images that appear on your computer screen so that
they can be uploaded to the memory card in your
camera. This allows you to include documents that
you have created with your computer in a slide show
on your camera, or to transfer image representations
of your documents using a memory card.
For Windows users
To make screen shots using EPSON File Converter,
follow these steps.
1. To open EPSON File Converter, click
Start
, point
to
Programs
and then to
EPSON File Converter
,
then click
EPSON File Converter
. The Convert to
the DCF file menu is displayed.
2. Click the
Screen Capture
tab. The Screen
Capture menu is displayed.
file name box
Screen Capture tab


