2-22
Using EPSON Photo!3
L
Proof Sign-off:
K. Pipa _______
M. Fujimori _______
R. Thomson _______
R4C5700
Rev. C
A5 size PHT3.FM
4/6/01 Pass 0
Setting the clock
When configured correctly, your camera
automatically records the time and date that your
photos are taken. When you transfer pictures from the
camera to your computer, you can see exactly when
each shot was taken.
In order to record the time and date, you need to set
the camera’s clock using the camera’s LCD monitor or
by using the Set Time feature as described below. The
camera’s clock will continue to keep time accurately
as long as power is being supplied to your camera. If
your batteries run out, you must replace them within
30 minutes to avoid losing the time settings in your
camera.
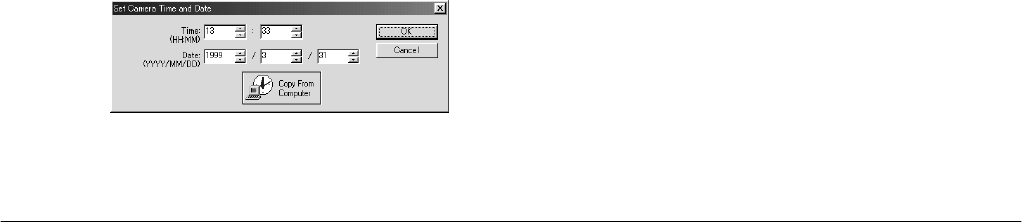
Follow these steps to set the camera’s clock.
1. On the Setup menu, click the
Set Time
button. The
Set Camera Time and Date dialog box appears.
2. Use the arrows to change the time and date. If you
want to set your camera’s date using your
computer’s time and date, click the
Copy From
Computer
button.
3. Click
OK
. EPSON Photo!3 updates your camera’s
time and date.
Changing the camera ID
If you want to change the name that is used to identify
the camera when it is connected to a computer, simply
type a new name in the Camera Id box on the Setup
menu. This camera name is displayed on the
introductory screen when you start EPSON Photo!3
and in the About dialog box. You can also display your
camera ID by clicking the
Photo Info
button.


