


21
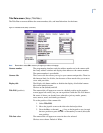
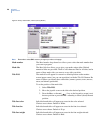
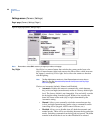
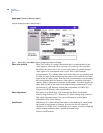
Mask color You can customize the color of each mask. Individual masks will appear on
screen in the color selected.
Choices are Gray (default) and Red.
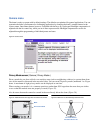
Show The Show button displays the mask that is currently selected by the mask
number field. The screen will say “Privacy mask preview” in the upper left
corner. Press iris +/-, esc, or set ( ) to return to the menus.
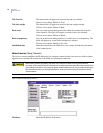
Program The Program button programs the mask. There are two screens for
programming masks. The first screen positions the camera view and the
second screen sizes the mask.
To program masks:
1. Select Program on the programming interface.
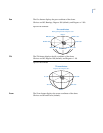
The programming interface will be replaced by a full screen of
live video overlaid with a grid that asks you to establish the center
of the privacy mask area.
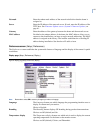
2. Use the joystick to pan, tilt, and zoom the camera to the desired view.
3. Press the iris + or the set ( ) key on the keypad to save (accept)
the camera view or press the iris - or esc key to cancel (abort) the
camera view.
Canceling the camera view returns you to the Privacy Masks
screen. Accepting the camera view advances you to the second
mask-programming screen.
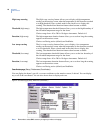
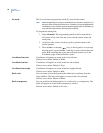
4. At the second screen (if you accepted the camera view), use the
joystick to adjust the height and width of the mask. Remember to
make the mask 50% larger than the area you want hidden.
Up increases the height, down decreases the height, left decreases
the width, and right increases the width.
5. Press the iris + or the set ( ) key to save (accept) the mask size
or press the iris - or esc key to cancel (abort) the mask.
Canceling the mask returns you to the first mask-programming
screen, where you reposition the camera view. Accepting the
mask size accepts the mask, and its size, and returns you to the
Privacy Masks screen.
Clear The Clear button deletes the mask currently assigned to the selected mask
number.