


140
Configuring the system remotely
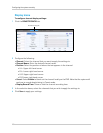
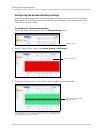
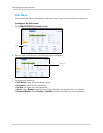
2 Configure the following:
• E
mail Enable: Select Enable or Disable to enable or disable the system from sending e-mail
notifications.
• Interval: Select the time interval the system sends out e-mail notifications. For example, if
you select 3, the system sends out e-mail intervals every 3 minutes if there are motion or
alarm alerts. If there are no alarm or motion events, the system will not send out an e-mail.
• SSL: Select Enable or Disable. SSL (Secure Socket Layer) may be required for certain e-mail
servers.
• SMTP Server: Enter the name of your e-mail server’s SMTP server.
• SMTP Port: Enter your e-mail server’s SMTP port.
• Sender Email: Enter the e-mail that you want your receiver to see.
• Sender Pwd: Enter the password of your e-mail account.
• Receiver Email: Enter the e-mail you want to send alerts to.
• Email Test: Click the Test button to send a test e-mail the receiver’s address.
3 Cl
ick Save to apply your settings.
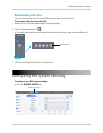
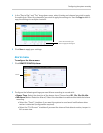
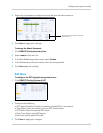
Using the Lorex E-Mail server
If you do not have your own SMTP email account, you can use the built-in Lorex e-mail
server to send out e-mail notifications.
To use the Lorex E-mail server:
1 Beside th
e "Email Enable" drop-down menu, select Default.
2 In the
"Interval" drop-down menu, select the timing interval between email alerts. For
example, if you select 1 minute, the system sends an e-mail alert every minute for the
duration that the system detects an event (i.e. motion).
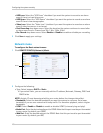
3 In the "Sender Email" field, ent
er the e-mail address that you wish to see when you receive an
e-mail alert.
4 In the "Rec
eiver Email" field, enter the e-mail address that will receive e-mail alerts from the
system.
5 Cl
ick Save to apply your settings.
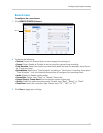
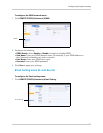
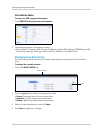
Device Menu
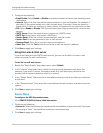
To configure the HDD Information menu:
1 Cl
ick REMOTE CONFIG>Device>Hdd Information.
2 Co
nfigure the following:
• Ov
erwrite: Select the duration the hard drive will record before it overwrites itself. If you leave
the setting to "Auto", the hard drive records on a continuous loop.
3 Cl
ick Save to apply your settings.