


34
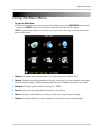
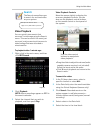
Using the Main Menu
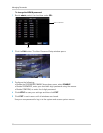
Display
The display menu allows you
to configure DVR image
settings, and general
settings on how your DVR displays
names and titles on screen.
Tip: When you want
to apply the setting
to multiple channels, click the "Copy
To" drop-down menu, and select All.
Click the Copy button to copy the setting
across all channels.
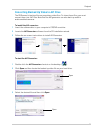
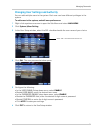
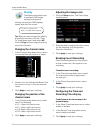
Changing the channel name
1 In the Channel drop-down menu, select
the channel that you wish to re-name.
2 Doubl
e-click the field beside Name. Use
the mouse to enter in the new channel
name.
3 Click Appl
y to save your settings.
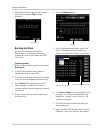
Changing the position of the
channel name
1 In the Position drop-down menu, select
one of the following:
• U-L : Upper left hand corner
•
D-L: Lower right hand corner
• U-R: Upper right hand corner
• D-R: Lower right hand corner
2 Click Appl
y to save your settings.
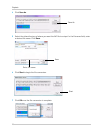
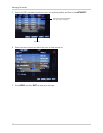
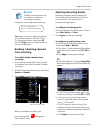
Adjusting the image color
1 Click the Setup button. The Color Setup
window opens.
2 Dr
ag the slider to adjust the color values
for the following: Hue, Brightness,
Contrast, Saturation.
3 Cl
ick Apply to save your settings.
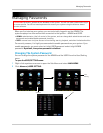
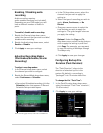
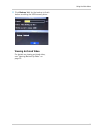
Enabling Covert Recording
Covert Recording blanks out the screen
so that it seems as if the system is not
recording.
To enable covert recording:
1 In the
Channel drop-down menu, select
the channel you wish to apply covert
recording to.
2 In the
Covert drop-down menu, select
Enable.
3 Cl
ick Apply to save your settings.
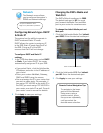
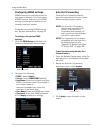
Configuring the Time and
Recording Time display
To add/remove the time stamp in the
system display:
1 In the Sho
w Time drop-down menu, select
enable or disable.
2 In the
Record Time drop-down menu,
select enable or disable.
3 Cl
ick Apply to save your settings.
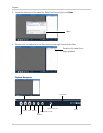
Right-click>Main Menu>Display
To open the Display menu:
Channel drop-down menu