


36
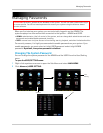
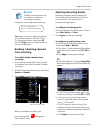
Enabling / Disabling audio
recording
Audio recording requires
audio-enabled cameras (not included).
Depending on your DVR model, you will
have a different number of Audio-In
ports.
To enable / disable audio recording:
1 Beside th
e Channel drop-down menu,
select the channel that you wish to enable/
disable audio recording.
2 Beside th
e Audio drop-down menu, select
Enable or Disable.
3 Cl
ick Apply to save your settings.
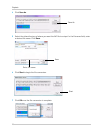
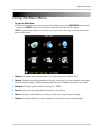
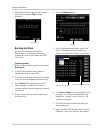
Adjusting Recording Modes
(Continuous/Schedule/ Alarm
Recording)
To adjust recording modes:
1 In the
Channel drop-down menu, select
the channel you wish to configure.
2 Beside the
Record Mode drop-down menu,
select Continuous or Schedule.
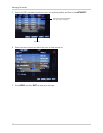
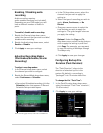
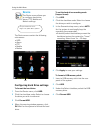
• If you select Scheduled recording, click the
Schedul
e button that appears. A Record
Schedule Setup window opens.
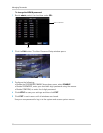
a. In the CH drop-down menu, select the
channel th
at you wish to apply the
setting to.
b. Select the type of recording you wish to
appl
y: Alarm, Continuous, or No
Record.
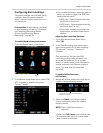
c. Drag your mouse cursor to select the
time and
day you wish to apply the
settings to. The grid changes colors as
you apply the setting.
Optional: Under
the Copy and To
drop-down menu, select the day that you
wish to apply the setting to, and then
click Copy. For example, you may want
to copy the setting to Mondays through
Thursdays only.
d. Click A
pply to save your changes.
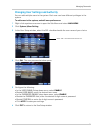
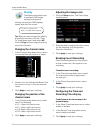
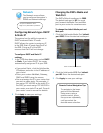
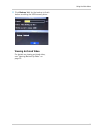
Configuring Backup File
Duration (Pack Duration)
The "Pack Duration" refers to the
duration of a backed up file in the
system. By default, a recording is
"packaged" into 15 minute video files.
To change the file "Pack Time":
1 In the P
ack Duration drop-down menu,
select the desired "Pack Time" duration (
15~60 minutes).
2 Click Appl
y to save your settings.
Select recording type: Alarm, Continuous or No Record
Pack Duration